
 08-28-2015, 10:09 AM
Last edit by: IB Advertising
See related guides and technical advice from our community experts:
Browse all: Engine
- Toyota Camry 4th, 5th, and 6th gen How to Paint Engine Cover
Step by step instructions for do-it-yourself repairs.
Browse all: Engine

Painted Heat Shield
#1
03-21-2015, 11:05 PM


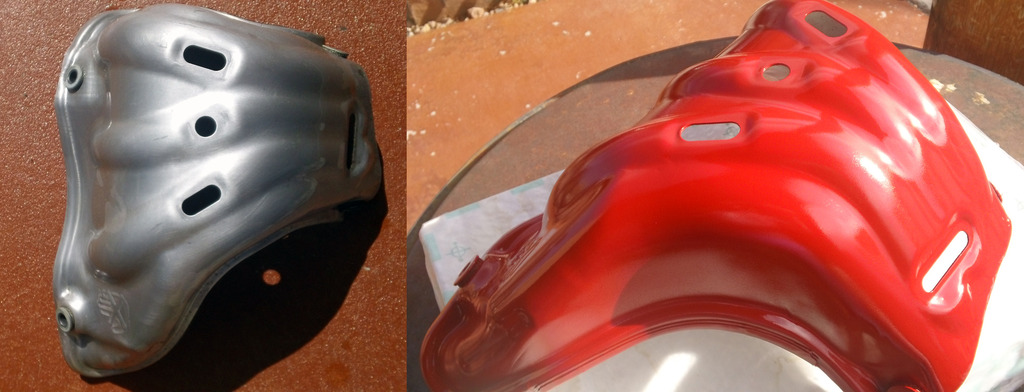
Have been thinking my engine compartment would look good black and red. So, took off the upper heat shield today. Cleaned it with brake cleaner, then took it inside and scrubbed it down with a green Scotch sponge all nice and shiny. Then put 3 coats of VHT engine enamel primer (550F), and topped that off with 4 coats of the same brand and temp red enamel. Looks sweet. I install it back in tomorrow so will show the engine compartment before/after then.


#4
03-22-2015, 04:28 PM
Thanks 
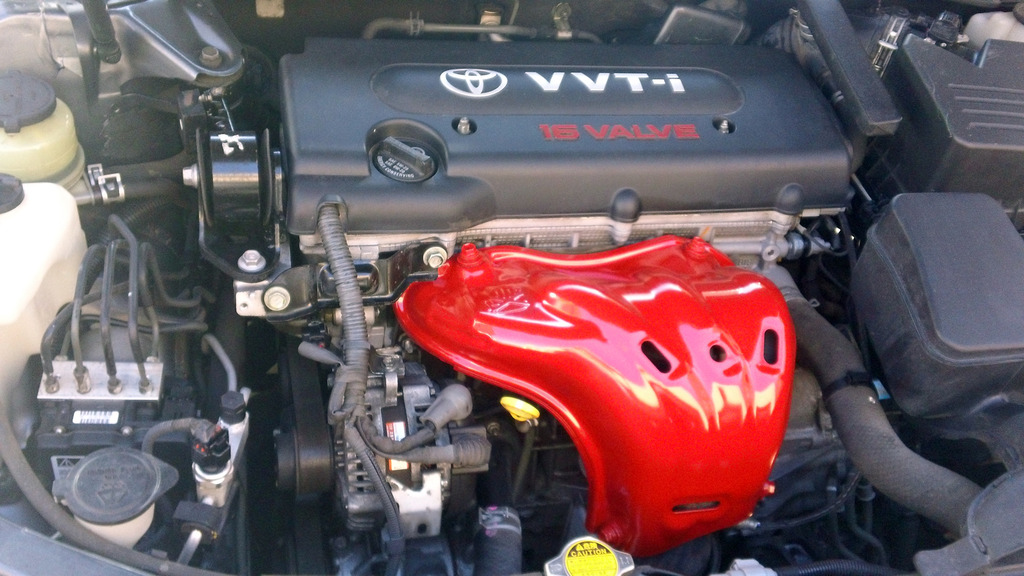
Re-installed the heat shield. Note to anyone interested in doing the same: it is going to bake off some noxious fumes for a bit. Some seriously bad **** in that paint, so be prepared to roll with your windows down for awhile (the air intake is very close to that shield, so a lot of it comes right into the cabin). I ran the car for maybe 15 minutes or so in the driveway with the windows down, then did some shopping for a few hours, letting it get nice and hot. I checked the temp with my infra gun, and the shield was in the 275F range, so well below the threshold for the primer and paint.
You can see I also painted the bolts, but that didn't hold well. I thought I'd put a piece of electrician tape around it to protect it form the socket while tightening it down, but the paint was coming off with the tape (DOH!). I did two layers of primer and three of paint on those bolt heads, but just did not stick to them well. Maybe if I had scoured them better, then maybe baked them or something. Anyway, I think I'd prefer them gloss black anyway. Maybe some day.
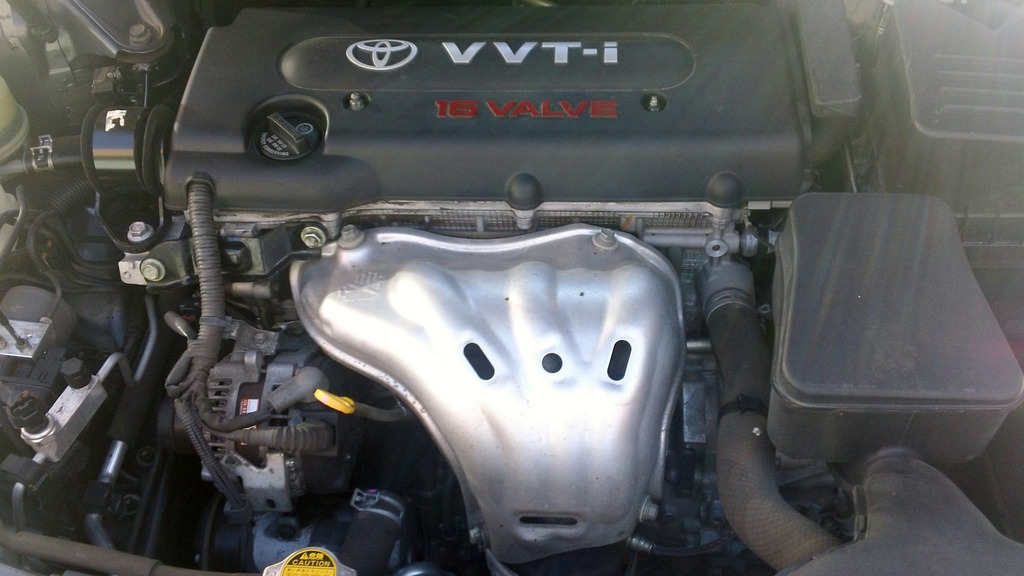
Before:
After:
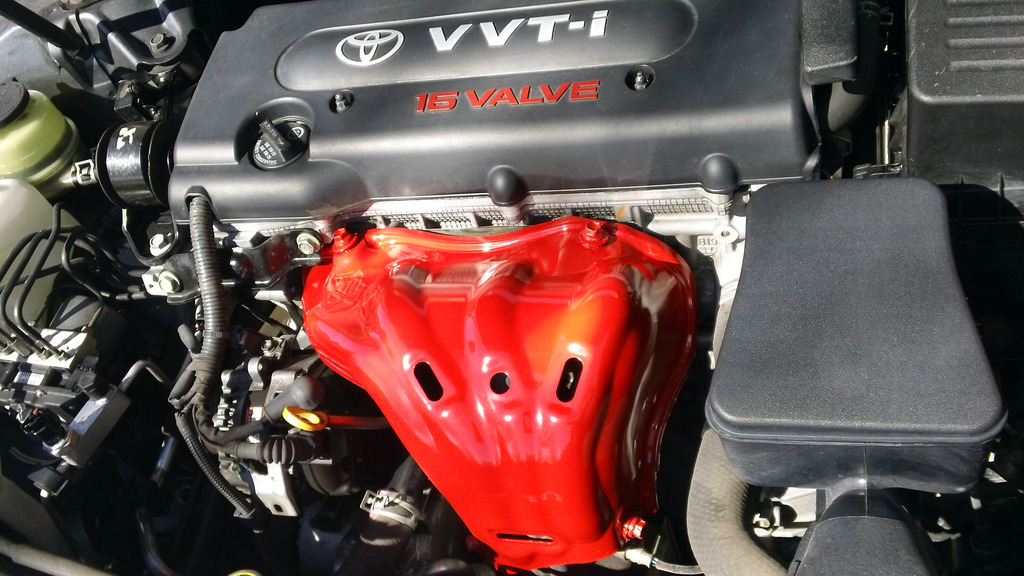
Sun reflection
At some point I may get crazy and remove the alternator, disassemble it, and paint it's housing the same red. Then maybe hit the plastic air box parts with a gloss black to make them pop. Hmmm.
Re-installed the heat shield. Note to anyone interested in doing the same: it is going to bake off some noxious fumes for a bit. Some seriously bad **** in that paint, so be prepared to roll with your windows down for awhile (the air intake is very close to that shield, so a lot of it comes right into the cabin). I ran the car for maybe 15 minutes or so in the driveway with the windows down, then did some shopping for a few hours, letting it get nice and hot. I checked the temp with my infra gun, and the shield was in the 275F range, so well below the threshold for the primer and paint.
You can see I also painted the bolts, but that didn't hold well. I thought I'd put a piece of electrician tape around it to protect it form the socket while tightening it down, but the paint was coming off with the tape (DOH!). I did two layers of primer and three of paint on those bolt heads, but just did not stick to them well. Maybe if I had scoured them better, then maybe baked them or something. Anyway, I think I'd prefer them gloss black anyway. Maybe some day.
Before:
After:
Sun reflection
At some point I may get crazy and remove the alternator, disassemble it, and paint it's housing the same red. Then maybe hit the plastic air box parts with a gloss black to make them pop. Hmmm.
Last edited by DIYDad; 03-22-2015 at 04:30 PM.
#6
03-23-2015, 07:51 AM
The shield was in pretty good shape to begin with. I hit it with brake cleaner first, then took it inside and scrubbed it down with a green Scotch sponge to get all baked on crud off it. By then it was shiny. Then the three coats of primer (10 minute spacing) and four top coats (10 minute spacing). I sprayed the last coat heavy. That's it. We'll see how it holds up, but it felt nice and smooth and slick under my hand. The big test will be if it begins to peel off after a few weeks or months, and if it holds up to a pressure sprayer when cleaning the engine.
#8
03-23-2015, 08:27 PM
Yeah, I hit the bolt heads with 2 coats of primer and 3 coats of paint, just did not take as well. Might be I should have roughed them up a bit to allow the primer to take better. Dunno. I do plan on touching them up now that they are tightened in. This coming weekend perhaps. But I think they would look better gloss black - good contrast
Last edited by DIYDad; 03-23-2015 at 08:45 PM.
#9
03-23-2015, 11:42 PM
I like this look very much.
I might attempt something like this when it warms up around here.
Of course it will depend on how rusty the bolts are that hold the shield in place! Gotta love all that road salt here in New England!
I might attempt something like this when it warms up around here.
Of course it will depend on how rusty the bolts are that hold the shield in place! Gotta love all that road salt here in New England!
#10
03-24-2015, 10:17 PM
You get more exposure to the road salt for sure - we get some where I am at. Maybe 6 or more times a year on average we have sanded/salted roads, so not as bad a problem. That would be some serious salting/icy slush to get that upper heat shield I think! I have been thinking of getting a can of Kroil from Kano Labs to see if it is a better penetrator than PB Blaster (which has been a life saver).
Anyway, just be sure to allow yourself the ability to drive with the windows down for a few days - say 3 or so. It's pretty rough the first several hours. I was fine over the weekend, but it was a bit chilly Monday morning going to work. 37 degrees, and I had to open up some windows a crack to allow fresh air to vent around. To prep/paint it properly (I think) requires most of a day, and I preferred to allow it to cure overnight before installing it back in.
I like that the red I chose is pretty close to the lettering on the valve cover insulator thing-a-ma-bob. I am really excited to do the same to the upper intake manifold on my '97 Tacoma, but in blue. That is going to look sick