Toyota Camry 1997-2001: How to Replace Inside Door Handle
Sometimes you don't know your own strength, and when that "problem" of yours kicks in, you find your Camry with a broken door handle. But not to worry, we'll show you how to easily replace it; maybe for the third time if you've forgotten how.
This article applies to the 4th Generation Toyota Camry (1997-2001).
If the interior door handle to your Camry is torn apart or broken in half, how will you get out? Well, before having to slide out through the window or exit through one of the other doors, you might want to replace the door handle and skip the inconvenience. The process is easy to do yourself, and we'll show you how!

Materials Needed
- Small and large flat head screwdriver
- Phillips screwdriver
- Trim removal tool
- Panel popper
- 10mm box wrench
Step 1 – Remove the door panel
- First, roll the door window all the way down.
- Use a trim removal tool to pry out the power window switch, but don't yank it out.
- Unplug the switch's wire harness connectors.
- Use a panel popper to remove the three retaining clips on the door panel. There is one in the door handle, one below the armrest well, and one near the door hinges (refer to the yellow in Figure 1).
- Use a Phillips screwdriver to remove three screws that are located behind the clips you've just removed.
- Then remove an additional three Phillips screws. There are two at the bottom of the door panel and one underneath the armrest (refer to the red in Figure 1).
- Pry out and remove the door handle cover using the trim removal tool.
- Use the trim removal tool to pry out the outside edge of the door panel, which is the side near the door latch. Then make your way around the panel and lift it off the door frame (refer to the green in Figure 1).
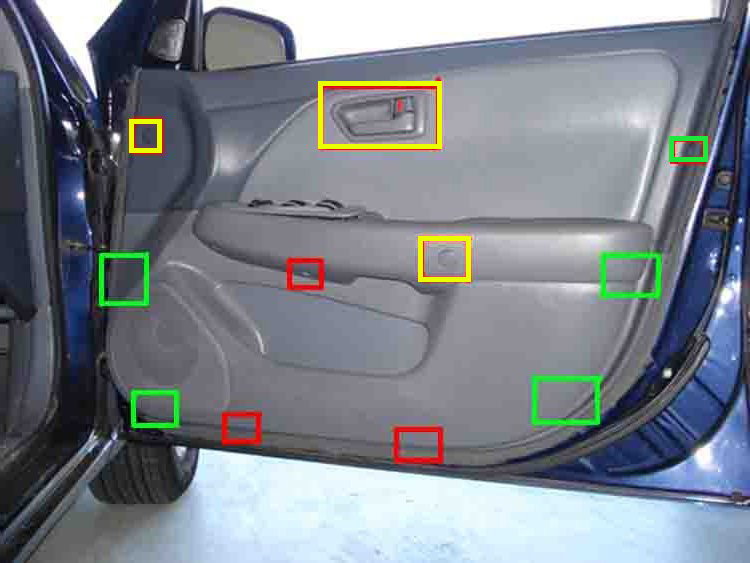
Figure 1. Remove the door panel. 
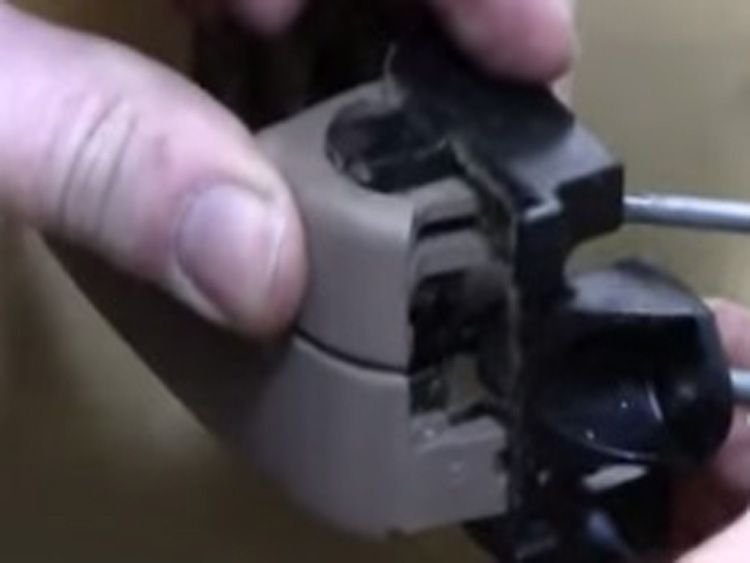
Figure 2. Remove the door handle's 10mm bolt.
Step 2 – Remove the old door handle
- Use a 10mm wrench to remove the bolt between the door handle rods.
- Tilt the door handle forward.
- Then wiggle the upper and lower rod free from the door handle.
Step 3 – Install the new door handle
Install the new door handle in reverse order to the steps above.
- Attach the upper and lower rod to the new door handle and place it onto the door frame.
- Secure the handle with the 10mm bolt.
- Reattach the door panel to the door frame and make sure it clips into place.
- Pop in the door handle cover.
- Tighten the door panel's six Phillips screws, and snap in the three retaining clips.
- Lastly, plug in the power window switch wire harness connectors, and test out the new door handle.
Featured Video: How to Replace Inside Door Handle
Related Discussion
- 1997 Camry Interior Door Handle Problems - CamryForums.com