This article applies to the 4th Generation Toyota Camry (1997-2001).
Oil leaks are no fun at all, either to diagnose or to repair. But no matter how small, they should never be overlooked. Some oil leaks can be innocuous enough, either a bad oil filter gasket or even an oil pan gasket. In either case, you may not have much oil leakage at all, but just enough to be annoying. These are simple repairs that you can do on your own in just a few minutes to a couple of hours at worst. If you have a significant oil leak, a really major one, especially one that really shows itself when you start your Camry, it could be a bad oil pump. This is not a cheap repair, but it is not one that you have to take to a professional to fix. You can change your oil pump without too much trouble with a little mechanical know-how, and this will save you a ton of money from having the pro do the job. Just go slow, take your time, and follow this guide to be back on the road with a sense of accomplishment that you did a pretty major repair successfully on your own.
Materials Needed
Ratchet and socket set of various lengths
Hydraulic floor jack
Jack stands
Breaker bar
Putty knife or scraper
The most common issue with an oil pump leak on these Camrys is a seal leakage. The pumps themselves are pretty much bullet proof, and leaks are almost always caused by the inner or the outer seal failure rather than any mechanical failure. This article will show you how to replace the seals rather than replacing the entire pump assembly, which will save you a ton of money.
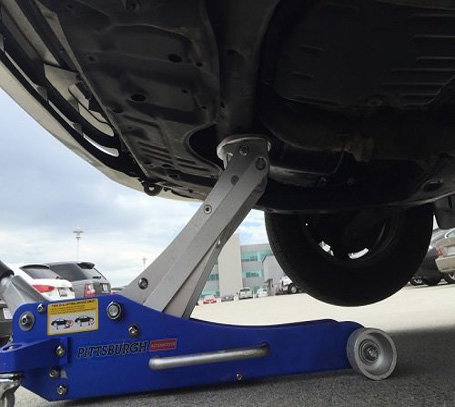
Step 1 – Jack up your car
Use a hydraulic floor jack to lift the front end and place on jack stands.
Chock the rear wheels.
Remove the passenger's side tire.
Figure 1. Jack up the car on the front crossmember.
Figure 2. Use the reinforced part of the pinch weld for stands.
Pro Tip
Always use jack stands when working under your car. Never use a floor jack only, because it can slip or suddenly collapse causing serious injuries.
Step 2 – Disconnect battery
Remove the negative (black) battery terminal.
Never work in the engine compartment without disconnecting the battery first.
Figure 3. Disconnect the negative battery terminal before starting any work in your engine compartment.
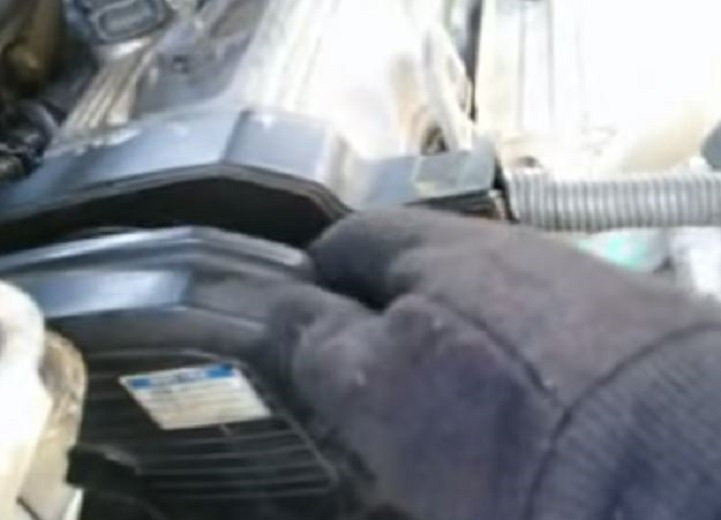
Step 3 – Remove belts
Remove the alternator, compressor, and main drive belts.
Remove the power steering belt.
Figure 4. Remove the drive belt, alternator, compressor and PS belts in order to get to the timing belt cover.
(Related Article: How to Replace Serpentine Belt - CamryForums.com)
Step 4 – Remove timing belt cover and timing belt
Once the other belts are removed, the four bolts for the timing belt cover will be exposed.
Remove the four bolts and pull off the timing belt cover. Set aside.
Remove the crank bolt and the crank pulley (make sure you mark the TDC on the crank pulley gear to match back up when replacing).
Once the crank pulley is off, it will expose the 10mm lower timing cover bolts. Remove those bolts.
Pull off the lower timing belt cover.
Remove timing belt.
Figure 5. Remove the timing belt cover to get access to the oil pump housing.
(Related Article: How to Replace Timing Belt - CamryForums.com)
Step 5 – Remove oil pump housing
Use a short socket on the six bolts that mount the oil pump housing and remove the bolts.
The six bolts are of different lengths, so make sure you note their proper locations on the housing.
Pull off the oil pump housing.
Figure 6. Keep the position of the bolts safe as they are of different lengths.
Step 6 – Inspect and replace the oil pump seals
With the pump housing off, there are two main seals that go bad.
The inner seal is a small O-ring type of seal. This is a little trickier to remove and replace, but isn't too difficult.
The outer seal is quite a bit bigger, but should pop in cleanly and easily once the old one is removed.
Use a plastic putty knife or scraper to make sure you get all the old seal remnants out of the seat.
Re-seat the new seals and the housing can be put back in place.
Figure 7. Replace the inner seal.
Figure 8. The outer seal is the most common culprit for oil leaks coming from the oil pump.
Step 7 – Button your car back up
Replace the oil pump housing bolts and torque them down to specification.
When replacing the crank pulley, make sure that the TDC mark on the gears match up or you will have a timing problem.
The cam shaft wasn't messed with, so the marks should line up appropriately already.
If you are anywhere near the recommended mileage for the timing belt replacement, you might as well put a new one on now since you are already in here. The water pump is normally changed out at the same time, so you can tackle that as well or wait on that until the time comes.
Replace the timing belt.
Replace the lower timing cover.
Replace the upper timing cover.
Replace the other belts.
Pro Tip
When replacing the timing belt, make sure to not turn the cam gears and get them out of proper sync.
Step 8 – Start the car and check for leaks
Re-connect the negative terminal.
Start the car, and check for any leaks from the oil pump.
Check the oil pressure indicator light on the dash.
Turn the wheels all the way to the right and then to the left to watch for the oil pressure light.
If everything is looking good, shut the car off.
Replace the tire and drop the car.
Take it for a test drive with plenty of hard turns in both directions, watching for any warning lights.
Park the car to check for any leaks after it has been sufficiently warmed up and driven a while.
Featured Videos: Toyota Camry Timing Belt and Oil Pump Seal Replacement
How to Replace Oil Pump
Do you have low oil pressure or a bad leak? Find out how to solve your problem here.
This article applies to the 4th generation Toyota Camry (1997-2001).
Is it time to change your oil ...
How to Replace Timing Belt and Water Pump
Time to change your water pump and timing belt?
This article applies to the Toyota Camry (1997-2011).
Many Camry owners dread the 60,000 mile marker because of the costly ...
Why is My Timing Belt Rattling?
Does your Camry sound like there's a rattle snake in the timing cover?
This article applies to the Toyota Camry 4-cylinder (1997-2011).
There is a lot going on in and near the ...
How to Replace Timing Belt and Water Pump
Avoid possible engine damage by replacing the timing belt.
This article applies to the 4th generation Toyota Camry (1997-2001).
The timing belt connects the crankshaft, ...
Oil Consumption Issues
Is the dipstick playing games with you? Probably not.
This article applies to the Toyota Camry 4th, 5th, and 6th generation (1997-Present).
Automobiles and motor oils have come a long way. ...
Power Steering Diagnostic Guide
A poorly functioning power steering system can make your Camry very hard to steer, especially in parking lots.
This article applies to the 5th generation Toyota Camry ...