Toyota Camry 1997-2001: How to Replace Temperature Control Console
The temperature control console in your Toyota Camry can malfunction for any number of reasons. If you find that yours is not working properly, whether it’s not providing you with air flow when you want it to or it’s providing too much air flow when you don’t want it to, chances are something within the console might need to be replaced. Here’s how you can take it apart and diagnose the problem yourself.
This article applies to the 4th Generation Toyota Camry (1997-2001).
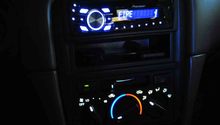
The climate control system is something we all take full advantage of in our cars, and we never give a second thought to it until it stops working. When this happens, you might find yourself in situations where you’re getting way too much air flow entering the cabin of your vehicle, or you're stuck in your car on a super-hot day with no air flow whatsoever. There are a ton of parts that make up the temperature control console as a whole, and if any of them goes, chances are you’ll need to take apart the entire unit in order to diagnose what went wrong. To learn how you can do it yourself and save yourself a pricey trip to the mechanic, read on.


Materials Needed
- Phillips screwdriver
- Flat head screwdriver
Step 1 – Remove dashboard trim panel
- Remove the Phillips screws that hold the dashboard trim panel in place.
- Pull out the dashboard and use a flat head screwdriver to unplug the connectors.
- Once all connectors have been unplugged, you can push the dashboard toward the left and pull it off.

Figure 2. Remove the dashboard trim panel screws. 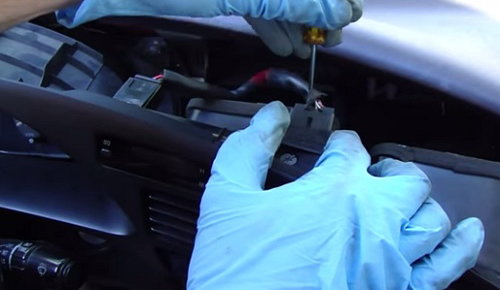
Figure 3. Unplug the dashboard panel wire harness connectors.
Step 2 – Remove cluster and temperature control unit screws
- Use a Phillips screwdriver to remove the screws holding the instrument cluster in place.
- Lift out the instrument cluster, but do not unplug the connectors. Simply set is aside to give yourself more work space.
- Once the cluster is out of the way, remove the mounting screws holding the temperature control unit in place.

Step 3 – Remove temperature control unit
- Using a flat head screwdriver, pry off each switch knob on the temperature control unit.
- There is one screw below the switch mount on the far left; this switch controls ambient cabin temperatures. Remove the screw using a Phillips screwdriver.
- Pull out the temperature control unit, and disconnect all of the connectors and the air flow control arm. You can now remove the unit from the center console housing.

Figure 5. Remove the temperature control unit knobs. 
Figure 6. Unplug the temperature control unit connectors.
Step 4 – Install new temperature control unit
Install the new temperature control console in reverse order to the steps above.
- Connect the air flow arm and wire harnesses to the back of the temperature control unit.
- Then slide the new temperature control unit into the center console housing, and secure it with the mounting screws.
- Re-install the instrument cluster and dashboard trim panel.
- Lastly, start the car and test the new temperature control unit.
Featured Video: Temperature Control Knob Console Replacement
Related Discussion
- Heater Control Knobs - CamryForums.com