Toyota Camry 1997-2006: How to Test and Replace O2 Oxygen Sensor
Has your oxygen sensor failed? Maybe it's a good idea to double check before you spend money on a sensor you don't need.
This article applies to the Toyota Camry 4th and 5th generation (1997-2006).
It's only been four days since your last fill-up, but for some reason your tank hit empty. Although your gas bill might be a bit over budget this month, the good news is that was the easiest diagnostic on your car that you've ever done! The issue is a faulty oxygen sensor, causing poor engine performance and excessive fuel consumption. The even better news is where the oxygen sensor is located, right in front of the engine. So if you want to get back to descent gas mileage (without spending more then the cost of the extra gas used this week), use these following instructions to replace the air/fuel (oxygen) sensor in your Toyota Camry.

Materials Needed
- Adjustable wrench
- Penetrating oil
- Replacement sensor
- Rubber gloves
- 10mm socket
- 3/8" ratchet
- Repair manual
- Multimeter
Oxygen sensors' locations vary according to the type of engine you have, with the 4-cylinder models being much easier to service than the V6. This example vehicle is a 4-cylinder. For the V6, check out the Related Video below.
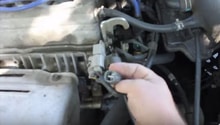
Step 1 – Remove heat shield and check sensor
Use the 10mm socket to remove the bolts for the exhaust manifold heat shield and remove it to expose the oxygen sensor.

Before you go off replacing this part, you need to be sure it is malfunctioning. So you'll have to check that there is no current in the sensor's plug.
- Unplug the sensor.
- Connect your multimeter to read the DC voltage on the harness plug and ensure the sensor is receiving power.
- Check the prongs on the oxygen sensor's plug.
- If the resistance reads lower than the listed numbers in your repair manual, the sensor is damaged and requires replacement.
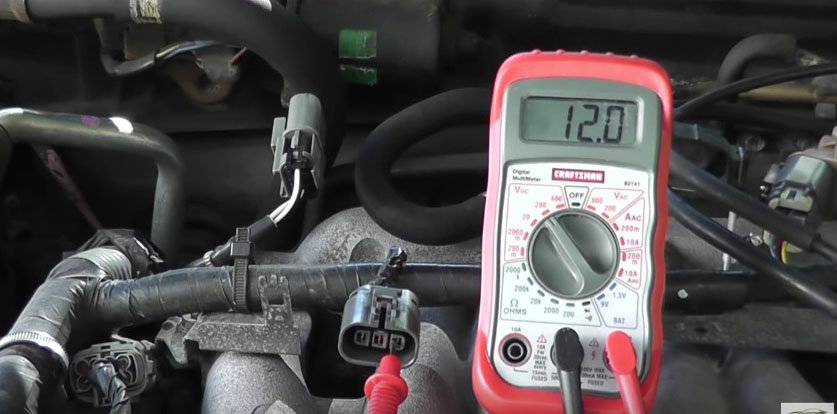
Figure 2. Ensure the harness plug has power. 
Figure 3. Check the reading. If its under the number listed for the vehicle, replace the sensor.
Featured Video: How to Test Oxygen Sensor
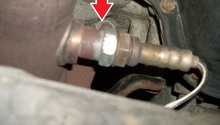
Step 2 – Remove the sensor
Locate the connection near the top of the engine and unplug the sensor.

- Spray some penetrating fluid on to the oxygen sensor and allow a few minutes for it to soak.
- Fit the adjustable wrench onto the sensor and break it loose.

- Continue loosening the sensor by hand and remove it.

The second sensor, known as the Bank 1 Sensor 2, is found beneath the chassis of the vehicle. It follows the same premise of removal, except its wire plug actually connects through the cabin of the vehicle.
- Locate the sensor connection behind the driver's side seat.
- Disconnect the sensor.

Figure 7. Locate the sensor connection. 
Figure 8. Disconnect the wire connection.
- Spray penetrating fluid onto the sensor.
- Use an adjustable wrench to remove it.

Step 3 – Install the new sensor
The new sensor will come with a small pouch of anti-seize compound that you need to apply on its threads. This compound allows the sensor to be easily removed, just in case the unit fails.
- Wear some rubber gloves and apply the anti-seize to the old sensor.
- Take the sensor and thread into its mounting location.
- Hand-tighten it.
- Grab your adjustable wrench and tighten the sensor.

Figure 10. Apply anti-seize to the new sensor. 
Figure 11. Hand tighten the oxygen sensor. 
Figure 12. Use the adjustable wrench to tighten the oxygen sensor.
The same applies for the Bank 2 Sensor 1. Tighten it in place with an adjustable wrench, and snake the wire plug through the top of the floor board. Reconnect it.

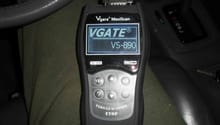
Step 4 – Install heat shield and clear codes
- Install the heat shield back onto the manifold and slide the wire clip through its hole.
- Plug the wire back into the harness.

With everything connected, turn the ignition on and connect your diagnostic machine. Search for the clear codes option and press it. If everything is in working order, you'll be back to getting normal fuel economy.

Featured Videos: How to Replace Oxygen Sensor on I-4
Related Discussions and Video
- O2 Sensor PO135 Again?? Help! - CamryForums.com
- Check Engine Oxygen Sensor - CamryForums.com
- Oxygen Sensor Location - CamryForums.com
- Where to Get Electrical Connector for O2 Sensor - CamryForums.com
- How to Replace Oxygen Sensor on V6 - YouTube.com