Toyota Camry 1997-2006: Transmission Diagnostic Guide
Toyota Camry models are known for their reliability, but without proper transmission maintenance and fluid changes, your car could become an aggravating and expensive problem. Here's how to diagnose any issues that your transmission may give you.
This article applies to the Toyota Camry (1997-2006).
One of the reasons people purchase a Toyota Camry is due to their legendary reliability. But as with any vehicle, you may experience automatic transmission problems when the factory recommended maintenance schedule isn't up to date, or if the fluid levels are improperly maintained. Other issues may occur from simple wear and tear on your Camry's transmission. The rule is that if you maintain your transmission consistently and on time, you are less likely to ever face a transmission problem in a car like the Camry. However, there is always an exception to the rule. Read on to solve whatever issue you may have with your transmission.

Materials Needed
- Floor jack and jack stands (if needed)
- Catch pan for transmission fluid (if needed)
- Ratchet and socket set
- Pliers
Step 1 – Check fluid level
See if the fluid is low.
If your transmission is failing to engage when cold, or if it has trouble shirting gears while driving, the first thing you should do is the least expensive thing you can do: check your transmission fluid.
- Allow your engine and transmission to warm up.
- Park your Camry on level ground and leave the engine running.
- Remove the transmission dipstick and wipe it clean, then reinsert it into the transmission dipstick tube.
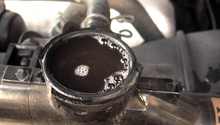
- Pull out the dipstick again and inspect the fluid level and the color of the fluid.

Figure 1. The dipstick is located next to the battery and is orange in color. 
Figure 2. If your dipstick is clear, you only need to check the level and top off if necessary. If it's burnt red or brown in color, it's time for a change.
Pro Tip
Be sure the transmission is warm or even hot, and make certain the car is on level ground.
If the fluid is up to the proper level, then proceed to Step 2.
Step 2 – Change the fluid
Swap out the fluids to get the system running cleanly.
If your Camry has very dark red or brown colored fluid, it's time to drain the pan and add fresh fluid.
- Shut off your engine and allow it to cool down.
- Jack up your car and chock the rear tires.
- Use a 10mm hex drive to remove the transmission plug.
- Be sure to wear rubber gloves and have a 12-qt capacity waste oil pan.

Figure 3.The transmission drain plug is easy to find and has round edges with a 10mm hex in the center. 
Figure 4. Drain the pan until it stops dripping and replace the plug. 
Figure 5. Replace fluid with Toyota ATF Type T-IV or any comparable brand that you can cross reference at your parts store.
If the fluids have already been changed or don't need to be yet, continue to Step 3.
Step 3 – Replace the filter screen
You may want to change the filter screen and clean the pan while you are changing out fluid.
- After draining the transmission pan (above), remove the 17 bolts that hold the pan in place with a 10mm socket and ratchet.
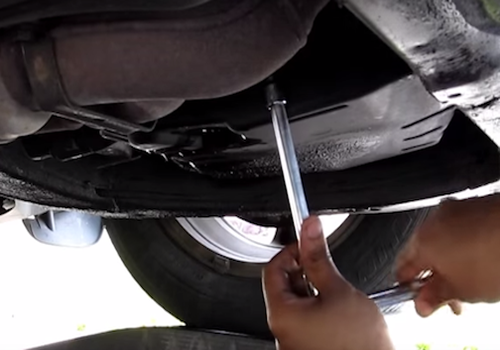
Figure 6. A 10mm socket is needed to drop all 17 bolts. Then, remove the pan. 
Figure 7. Remove the three 10mm filter bolts and lower the filter screen. 
Figure 8. The old filter vs. the new one.

Figure 9. Remove the old gasket, clean any residue off the pan, then place the new gasket onto the pan. 
Figure 10. Line up the bolt holes and bolt the new filter on using your 10mm socket. 
Figure 11. Install the pan with the new gasket and torque to 69 ft./lbs each.
You'll need approximately three quarts of fresh ATF T-IV fluid to refill the transmission again.
Pro Tip
Be sure to shift through the gears and recheck the fluid level. Take the Camry for a drive, then check the level one more time.
With a fresh filter continue to Step 4.
Step 4 – Check transmission codes
Decipher what the car is trying to tell you.
The Camry uses an ODB-II type diagnostic system. Connect a code reader to the car's ODB-II port and see if any trans codes are present. You may see these:
- P0773 Shift solenoid "E" electrical malfunction -SSV DSL
- P0753 Shift solenoid "A" electrical malfunction -SSV SL1
- P0758 Shift solenoid "B" electrical malfunction -SSV SL2
The three shift codes affect the three electric solenoids inside the trans. The transmission may not shift properly or it may feel like it's stuck in overdrive.

Figure 12. The OBD-II scanner outlet is located at the left lower part of your dashboard. 
Figure 13. Here's a sample of an OBD-II scanner. This one is available at Harbor Freight.
The three transmission solenoids need 12-volts of power to function properly and to communicate with the computer. They are accessible by removing the transmission pan (see above). If the solenoids are not working properly, the transmission may default to a lower gear. This results in sluggish acceleration. Bolt in a new solenoid and plug it in. "Plug n' play!"

Pro Tip
It's important to check your OBD-II readings with your local Toyota dealer's service department or a good local import mechanic. Save yourself a lot of time, money and possible grief by replacing the correct shift module or solenoid.
Featured Video: Change your Trans Filter and Gasket
Related Discussion and Site
- Transmission FUBAR - CamryForums.com
- OBD-II Scanners - Harborfreight.com