Toyota Camry 1997-Present: How to Replace Brake Line
Bad brake lines can not only affect your pedal feel, but it can also affect your braking. Here's how to replace it yourself in the Toyota Camry.
This article applies to the Toyota Camry (1997-Present).
Your brake lines are the crucial connection between your hydraulic brake components, the master cylinder and the brake caliper. Any type of degradation or tears in the brake lines is terrible since it will cause brake failure and a potential accident. Before concluding that your brake lines need to be replaced, check your brake fluid level. If it is low, top it off and check for loss of fluid over time. If there is loss of fluid, then inspect your brake lines for cracks and degradation. It is always a good idea to check your brake lines if you ever suspect a problem however. Once you replace your brake lines, you will have the peace of mind of confident braking performance. As a word of caution, brake fluid is extremely corrosive, especially towards paint, so keep it away from your hands by wearing gloves and do not let it come near your paint.
Materials Needed
- 21mm socket
- Torque wrench
- 10mm & 12mm wrenches
- 14mm socket and ratchet
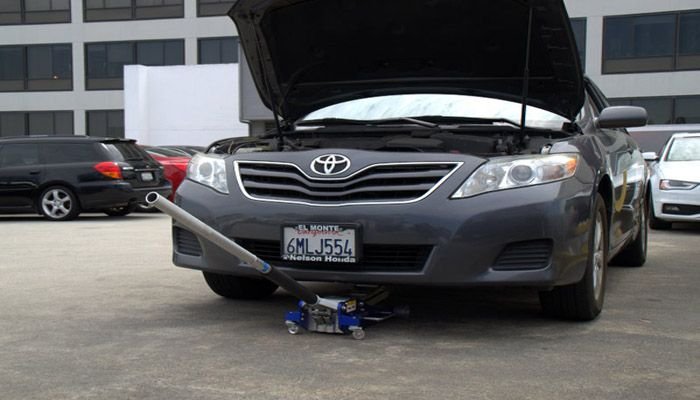
Step 1 – Lift front of vehicle and remove wheels
Lift the front of your Camry with a hydraulic jack on level ground. Use two jack stands on the both sides of the car to safely secure the car. This step is not optional as a hydraulic jack cannot always be trusted. Remove the wheels by removing the 21mm lug nuts.
Pro Tip
Make sure you’re jacking on the frame of the vehicle so you do not bend or damage anything.
(Related Article: How to Jack Up Your Car - Camryforums.com)
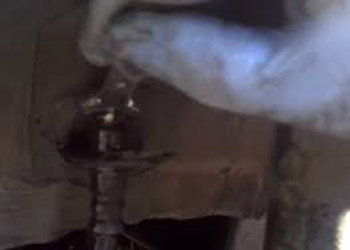
Step 2 – Remove the 10mm brake line bolt
Remove the 10mm brake line to hard line bolts as shown in Figure 2. Make sure the hard line does not turn or bend at all. If this happens, the hard line must be replaced.
Pro Tip
Spray WD-40 or another lubricant on this bolt and let it soak in for a few minutes to make this step much easier.
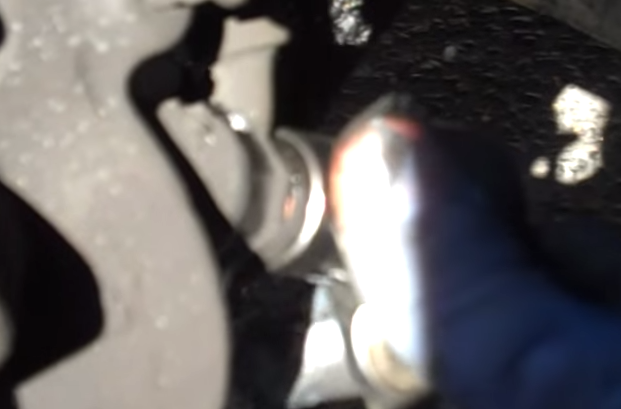
Step 3 – Remove brake line bracket bolt
Remove the 12mm brake line bracket bolts as shown in Figure 3. Set this bolt aside in a safe place as it is easy to lose.

Step 4 – Remove brake line to caliper bolt
Remove 14mm brake line to caliper bolt with a ratchet and socket. The new brake line should come with two crush washers that go on this bolt upon re-installation. You are almost done!
Pro Tip
Buy a new brake hardware kit if any of your bolts or clips are worn. They are cheap insurance against brake failure.
Step 5 – Remove clip near hard line
Remove the clip near the hard line as shown in Figure 5. This can be done easily by using the stalk of any of your wrenches and pulling towards you. That's it! Your brake line can now be maneuvered out of the fender well.

Pro Tip
Keep any connection points of your brake line extremely clean as contaminants are detrimental to braking performance.
Step 6 – Install new brake line
Install the new brake line in the reverse order of removal. Make sure to bleed your brakes after performing this service since air was introduced into the braking system.
- Install the clips near the hard line.
- Install the 14mm brake line to the caliper bolt.
- Install the 12mm brake line to the bracket bolt.
- Install the 10mm brake line to the brake line bolt.
- Raise the car a few inches then remove the jack stands.
- Slowly lower the car back down onto the ground.
Featured Video:How to Replace the Brake Lines
Related Discussion and Site
- Brake line replacement - Camryforums.com
- How to Replace Brake Lines - Autoanything.com