Toyota Camry 2002-2006: How to Install Stereo Speakers and Tweeters
Quality speakers and tweeters improve a large range of sound through the emphasis on mid-level and high-level tones. These speakers shine when subjected to high levels of treble, and also a great set of speakers is the perfect compliment to a 10 or 12-inch subwoofer.
This article applies to the 5th generation Toyota Camry (2002-2006).
Stereo speakers and tweeters are made from high strength plastics and polymers, which create an ideal amount of speaker movement without the risk of breaking. Upgraded magnetic voice coils are used to power the speaker, resulting in big time sound that is made to withstand the abuse of high power levels. The factory speakers are not capable of supporting this type of sound level, as the paper element easily distorts when subjected to high levels of vibration. So when mixed with the proper head unit and subwoofer, stereo speakers transform your Camry's music to another level of sound.

Materials Needed
- Phillips screwdriver
- Trim removal tool and panel popper
- 12mm socket
- Ratchet and extension
Step 1 – Remove the front door panel
- Use a panel popper to pry off the small circular clip on the corner of the door panel near the side mirror.
- Remove the Phillips screw behind the cover.
- Remove the two Phillips screws at the bottom of the door panel.
- Pull the interior door handle open, and remove the cover in the recessed area behind the handle.
- Remove the Phillips screw behind the cover.
- Remove the plastic insert inside the armrest well of the door panel, and remove the Phillips screw in the well.

Step 2 – Finish removing the front door panel
- Use a trim removal tool to pry off the small triangle panel near the side mirror.
- Then pry off the wooden trim piece with its attached window and lock switches.
- Disconnect the switches from the panel by squeezing the flexible tabs of the connectors and pulling them away from the panel. The larger connector has a sleeve that must be pulled up to unlock it.
- Remove the remaining Phillips screw in the area behind the switch cluster trim panel.
- Place your trim removal tool between the door and the door panel near the speaker. Begin to pry the door panel away from the door, and work your way around the side of the door panel until all the clips have been released.
- Push up on the bottom of the panel to slide the panel out of the window seal area.
- The last of the door panel connections are the door handle and door lock cables found on the backside of the door panel. Release these connections by pulling the end of the cable free from the door panel. Twist the cable enough to allow the ball at the end to slide out of the door panel's slot.
Note
Any plastic clips that broke during the removal of the door panel should be replaced. These retaining clips/pins can be found at most automotive parts stores.
Step 3 – Remove the front speaker
- Unplug the wire harness connector from the top of the speaker by squeezing the connector's flexible tab and pulling it away from the speaker.
- Connected to the door is the speaker's frame cover. The speaker itself is mounted to the frame by four Phillips screws. Depending on which speaker you are installing, you may have to remove both the frame and speaker, or just the speaker.

Step 4 – Install the front speaker
- Install the new speaker according to the manufacturer's instructions. Some manufacturers include a custom made speaker frame for proper clearance between the speaker and window glass. An extension harness may also be included, which eliminates the need for you to cut your factory wiring and splice in new wiring.
- Connect the new wiring to the positive and negative terminals of the speaker. Once connected, you can test the operation of the speaker by turning on the ignition and operating the radio.
- If the speaker is functioning properly, mount it to the door frame and re-install the door panel.
Featured Video: How to Install Stereo Speakers and Remove Door Panel
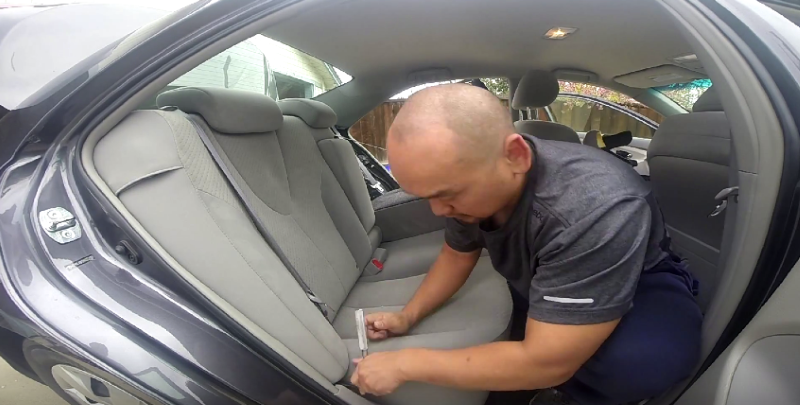
Step 5 – Remove the rear seat cushion side bolsters
- Fold down the rear seats to gain access to the 12mm bolts that secure the rear seat side bolsters to the car. There is one bolt at the bottom of each side bolster located in the gap between the bottom seat cushion and bolster cushion.
- Push up on the bolster to unlatch the hook behind the bolster cushion.
Step 6 – Remove the rear deck lid carpeting
With the rear seats folded down, you can see four push pin screws along the front of the rear deck lid. These are not ordinary push pins, as the center section of the pin must first be loosened like a normal screw. Only then can the bottom portion of the pin be pried off the deck lid.
- Use a Phillips screwdriver to loosen the four push pin screws, and then use a panel popper to remove them.
- There are two more pins on each side of the carpeting and one more in the middle section. Push in the center portion of these clips, and then pull the clips from the carpeting.
- Inside of the trunk, along the bottom of the deck lid, you will find two clips attached to the carpeting. These clips can be removed by lifting the clips up and off of the deck lid.
- Now that all the clips have been removed, pull the carpeting forward and place it over the rear seats.
Step 7 – Remove the rear deck lid
- At the back of the deck lid is the rear brake light. Push the brake light toward the rear of the car and lift it up to separate it from the deck lid.
- Squeeze the flexible tab on the harness connector and pull the away from the light.
- Now remove and release the clips of the interior C-pillar panels using the trim removal tool. These are the panels between the rear deck lid and rear doors, alongside the rear glass.
- If the plastic clips remain attached to the frame, you will need to pry them off and insert them back into the C-pillar panels.
- Grab the front of the deck lid and pull it upward. This will disengage the clips holding it in place.
- Then pull the deck lid forward, sliding the deck lid along the seat belts.

Step 8 – Remove the rear speakers
- Under the black matting you will find four screws holding each speaker in place. Remove the screws using a Phillips screwdriver.
- Pull out the speakers and unplug the attached wire harness connectors.
Step 9 – Install the new speakers
- Place the new speakers into position. As with the front speakers, follow the manufacturer's instructions for the specifics on electrical wiring.
- After the wires have been connected to the speaker, test it by switching on the ignition and playing the radio.
- Mount the speakers into place. Then re-install the deck lid, C-pillar covers, carpeting, and side bolster seat cushions.
Featured Video: How to Install Tweeters
Related Discussions
- 2002 Camry XLE Speaker Upgrade Discussion - CamryForums.com
- 2004 Camry Speaker Covers - CamryForums.com


