Toyota Camry 2002-2011: Smelly Air Vents Diagnostic Guide
Common causes and fixes for funky odors in your Camry's ventilation system.
This article applies to the 5th and 6th generation Toyota Camry (2002-2011).
Something stinks. You turn on your A/C and get blasted with a musty, mildewy odor. Not only is this unpleasant, but it could lead to additional problems in your vehicle if gone unchecked. There are a few things you can do at home to rectify the problem. Continue reading and be on your way to an aroma-free drive.

Materials Needed
- Safety goggles and gloves
- Can of automotive disinfectant spray
- New cabin air filter
- Garden hose
Step 1 – Check under the hood
Critters like to crawl up into warm engine compartments, and sometimes they don't make it out. Or, it could just be that excessive dirt and debris is causing the smell.
- Check the air intake for any kind of blockage such as leaves (or critters).
- Scan the engine compartment for signs of animal and insect infestation: droppings, webs, or chewed wires/hoses.
- Thoroughly clean the area if necessary; you can use engine cleaner and a garden hose, but be sure to cover water-vulnerable parts such as the alternator, distributor, and engine fuse box. You may still need to disinfect the system to completely eradicate the odor.
If the engine compartment is clean and free of damage, move on to the following step.
Step 2 – Check and clean the ventilation system
There could be mold in the system.
The A/C condenser produces moisture, and if it isn't drained or evaporated properly, mold can grow and accumulate. You will need to purchase a good-quality disinfectant spray and may even want to use an additional odor-removing spray.
- Check the air intake vents below the windshield, and make sure they aren't clogged with debris.
- Remove and inspect the cabin air filter. Even if the air filter isn't the source of the mold, replacing it with a fresh one might still be good idea.
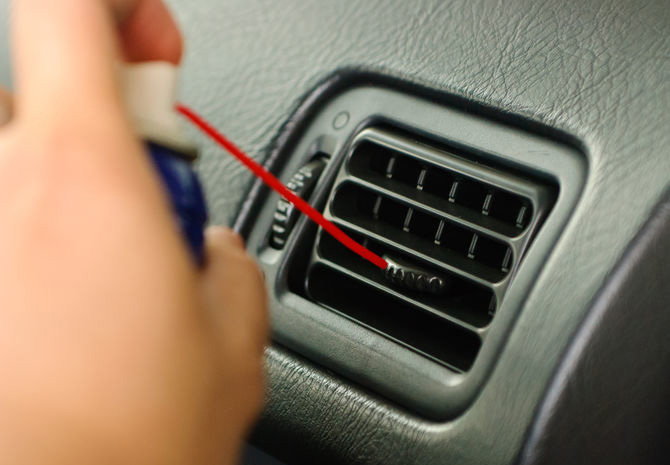
- Following the directions on the can of disinfectant, spray it into the vehicle's interior ventilation openings.
- Run the ventilation system on high, switching from re-circulation to fresh-air mode, and then from A/C to heat. Make sure you give the disinfectant time to dry out before you turn everything off.
- To keep condensation from lingering in the future, run the fresh-air mode—without the A/C on—before turning off the vehicle to give the system a chance to dry out.
If cleaning the ventilation system didn't remove the smell, move on to the following step.
Step 3 – Check and clean the evaporator
The evaporator could be clogged with debris or mold, or the drain hose might not be draining properly.
- Check the drain hose for evidence of mold. If it appears that moisture is gathering in the hose, it will need to be re-routed to ensure proper drainage.
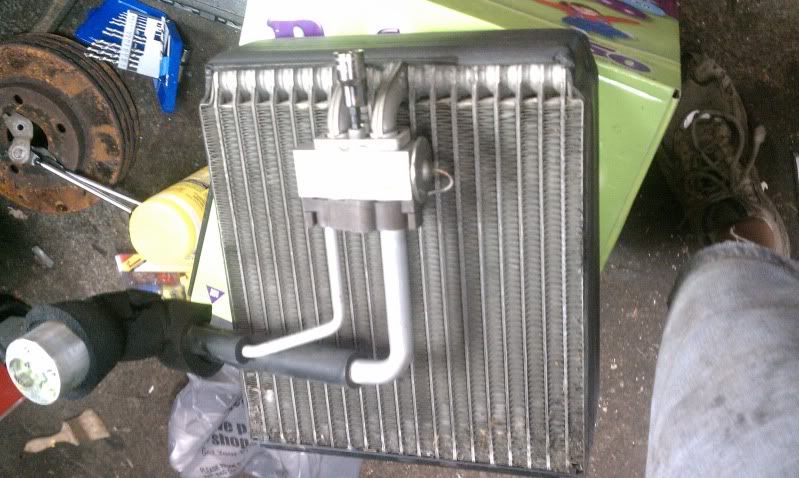
- Visually inspect the evaporator. If it is excessively grimy, the best fix would be to remove it and flush it with a garden hose and cleaner. Your A/C system will have to be depressurized by a professional before you can unhook the system.
Pro Tip
Always have your A/C system depressurized by a professional before disconnecting any system hoses or lines.
Move on to the last step if none of the above have removed the odor.
Step 4 – If all else fails, call in the pros
There could be mold and bacteria in places that are just too difficult for the home mechanic to access. If you've inspected and cleaned out all easy-to-access areas and the odor still persists, it might be time to consult the professionals.
Featured Video: How to Chemically Neutralize Odors
Related Discussions and Video
- Smelly Air Vents - CamryForums.com
- Odor A/C Vents - CamryForums.com
- Cabin Air Filter Replacement Toyota Camry - YouTube.com