Toyota Camry 2007-2011: Exhaust Modifications and How to Install an Air Intake
Upgrading your intake and exhaust systems are tried and true ways of increasing horsepower. Read this guide to find out more.
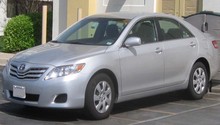
This article applies to the 6th generation Toyota Camry (2007-2011).
One of the simplest and fastest ways to enhance the performance of your Camry is by installing a new air intake and exhaust. The intake system in your Camry is designed to allow air into the engine and mix with fuel, thus providing the components for proper combustion. The exhaust system allows all the gases to exit the engine in a controlled and more compacted way, therefore allowing the entire system to work more efficiently.
Table of Contents
Exhaust Modifications
Air Intakes |
Headers |
Mufflers | |
|---|---|---|---|
Price |
$170-$260 | $270-$500 | $150-$250 |
DIY Level |
Easy | Difficult | Moderate |
Rating |
Recommended | Not Recommended | Recommended |
Best Quality: Air Intake
Best Value: Air Intake and Muffler
Air Intakes

Price – $170 to $260
DIY Level – Easy; no specialty tools or knowledge required.
Rating – Recommended
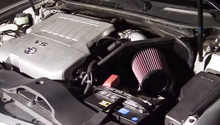
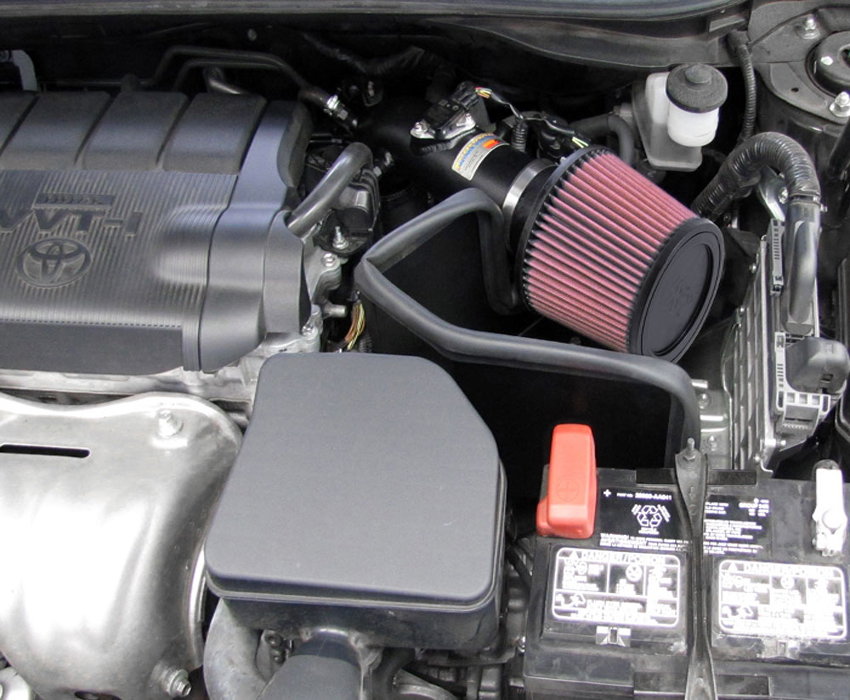
An aftermarket air intake in not only easy to install, but it's also a simple component that is reliable and easy to maintain in the long run. Most aftermarket air intakes rely on a reusable and washable air filter, which means that at every mileage interval, you only have to replace the filter and not the entire intake.
Make sure to check the emissions and noise regulations in your county and state to make sure that installing an aftermarket air intake is allowed, as some do not permit it. Also, make sure the intake you purchased is approved for your car and offers a warranty. Recommended for the owner who wishes to buy a relatively low cost mod that will not only improve performance, but also the sound of the exhaust.
Headers

Price – $270 to $500
DIY Level – Difficult; welding and possibly metal-cutting for installation.
Rating – Not Recommended for the average owner
The only reason why headers aren't highly recommended is because they, as stand-alone parts, will not severely impact the performance of your Camry, and they are quite expensive. A header is usually upgraded when the entire exhaust system is upgraded, from the headers to the mufflers.
Headers can either be narrow in diameter to compress exhaust gases, or be wide in diameter to allow greater amount of gases to travel more efficiently down the rest of the exhaust system. As with aftermarket air intakes, make sure check the emissions and noise regulations in your county and state to make sure that installing aftermarket headers is allowed. Not recommended for the average owner. This is a mod that should be undertaken either by a professional or by the owner who has prior vehicle modding knowledge.
Mufflers

Price – $150 to $250
DIY Level– Moderate; some welding may be required.
Rating – Recommended
Mufflers are the exit point for the exhaust gases that once originated as clean air entering the intake. The air travels through the engine, undergoes combustion in the engine cylinders (thus transforming into exhaust gas), exits through the headers, exhaust pipes, catalytic converter and then out from the muffler. Clearly, mufflers play the role of giving those exiting gases a custom acoustic sound for any vehicle.
Some sports mufflers have a wide open exhaust sound for a more aggressive feel, and others, such as the Camry, are much more reserved and quiet. Installing a muffler is an easy and cost effective idea if you want to give your Camry a sportier exhaust note without spending too much money. Recommended for those who wish to add a little flair and a sportier note to their exhaust system.
How to Install an Air Intake
Installing an air intake to your Camry is a simple and straightforward job. The process may differ slightly by manufacturer, but in most cases, follows an easy plug and play installation. The steps below show you how to get the job done right.

Materials Needed
- Phillips screwdriver
- Flat head screwdriver
- Ratchet and extension
- 10 and 17mm sockets
Step 1 – Disconnect the battery
Use a ratchet with 10mm socket to disconnect the negative terminal (black) of the battery.

Step 2 – Remove the stock air intake
- Remove two bolts securing the air box using a 17mm socket with ratchet and extension.
- Disconnect the MAF sensor and any rubber hoses connected to the air intake hose that leads to the engine.
- Then slide out each end of the air intake hose, and remove it from the engine.
- Use the 17mm socket to remove the air box mounting brackets, and remove the air box from the engine.

Step 3 – Install the new air intake
- Set up the new air intake heat shield, and then bolt it down using the brackets that came with your air intake kit.
- Install the new air intake hose and connect any removed hoses as well as the MAF sensor.
- Connect the air box to the air intake hose and remount it.

Step 4 – Test the air intake system
- Reconnect the negative (black) terminal of your battery.
- Start your car and make sure the intake is properly secure.
How to Install Cold Air Intake
Related Discussion
- Air Intake and Exhuast Upgrades for Camry - CamryForums.com