Toyota Camry 2007-2011: How to Replace Power Window Actuator
Every so often, your Toyota Camry's power window actuator can fail and your window could get stuck. Learn how to replace it yourself here.
This article applies to the Toyota Camry (2007-2011).
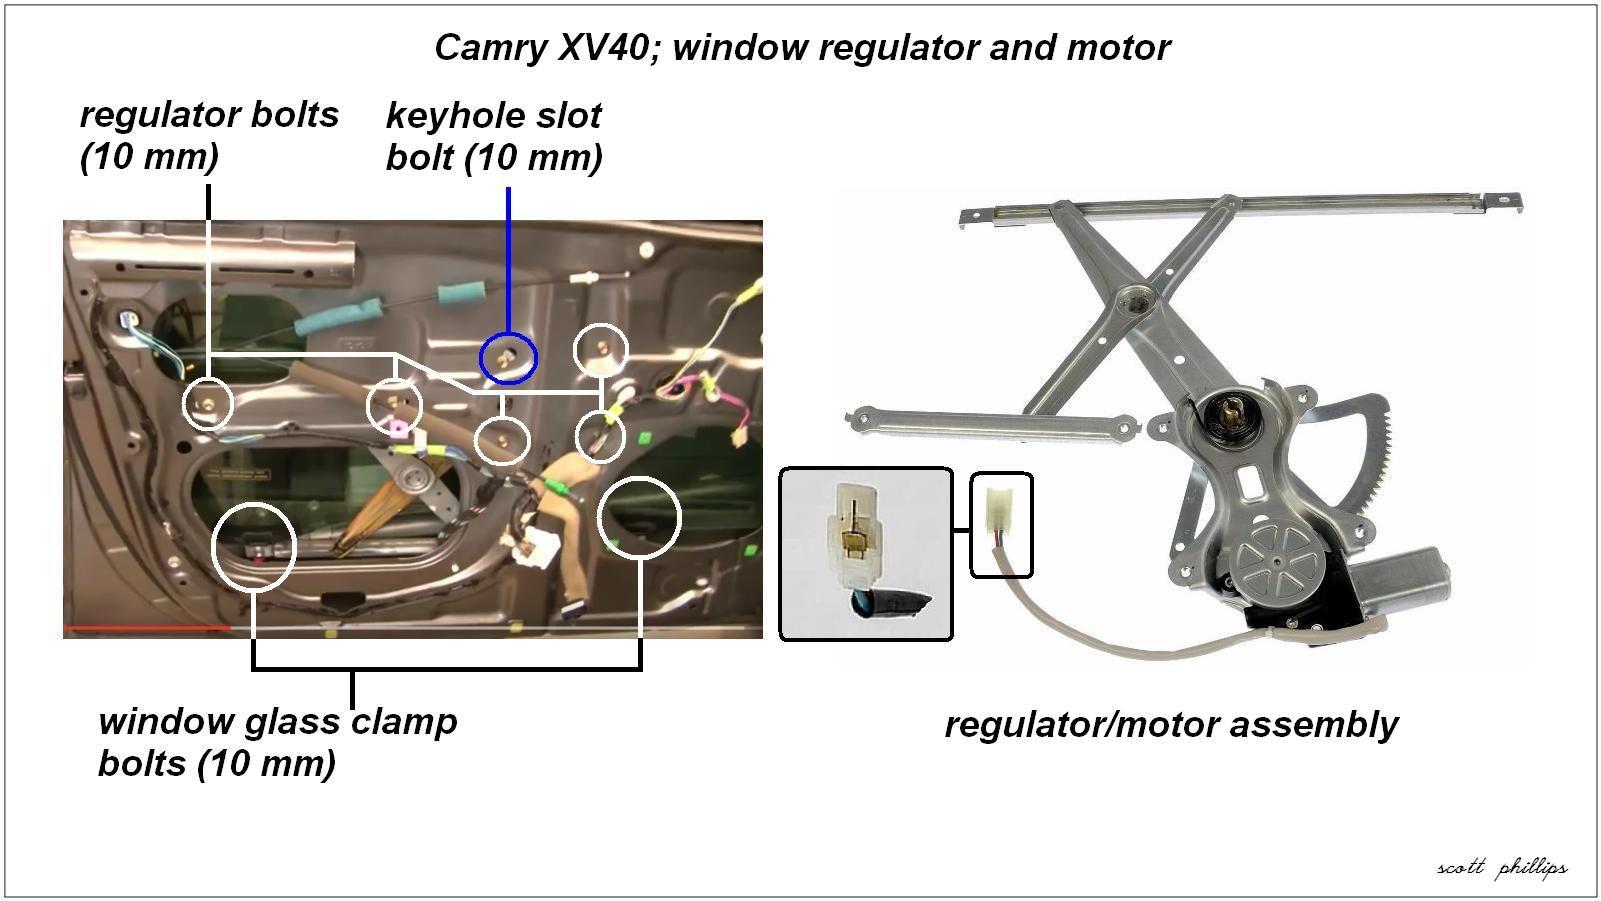
The power window regulator is the mechanism that moves the window up and down. The bottom of the window glass is clamped into the moving frame of the regulator, which is in turn driven by an electric motor. The window regulator and the motor are sold as two separate items. The regulator is about $85 and the motor can range from $250 to $320, depending on the features. To avoid excess expense, determine which component needs to be replaced. It is best to always order parts by using your VIN to insure suitability.

Materials Needed
- Window regulator and/or motor
- 3M butyl rubber strip-calk
- Plastic auto body pry tools
- Phillips screwdriver
- 10mm socket wrench
- Blue painter's tape
- Disposable vinyl or nitrile gloves
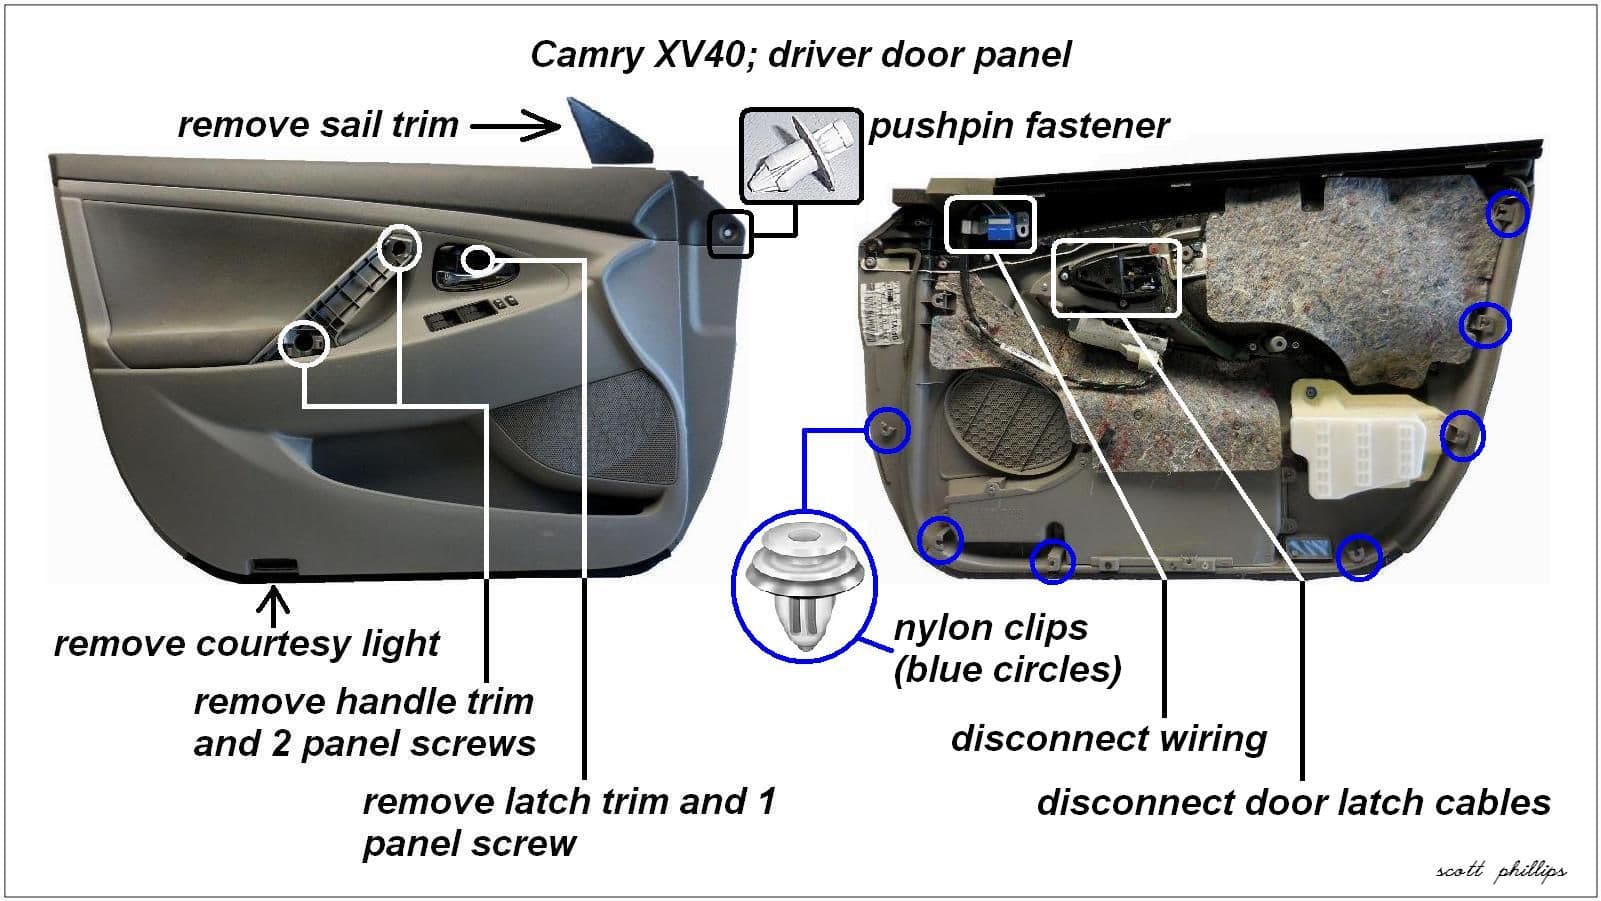
Step 1 – Remove door trim panel
There are two screws under the door pull cover. The bottom of the panel is held by nylon clips (not screws). Use plastic auto body pry tools to prevent scratching your trim.
- Pry off the sail trim piece in the upper front.
- On the front pushpin, depress the center post and pry out the pin.
- Pry off the door pull handle cover and remove the two screws.
- Pry off the latch handle trim and remove the one screw.
- Remove and disconnect the courtesy light.
- Pull the panel out from the bottom, releasing the nylon clips.
- Lift the panel off slightly. Then disconnect the electrical plug and latch cables.
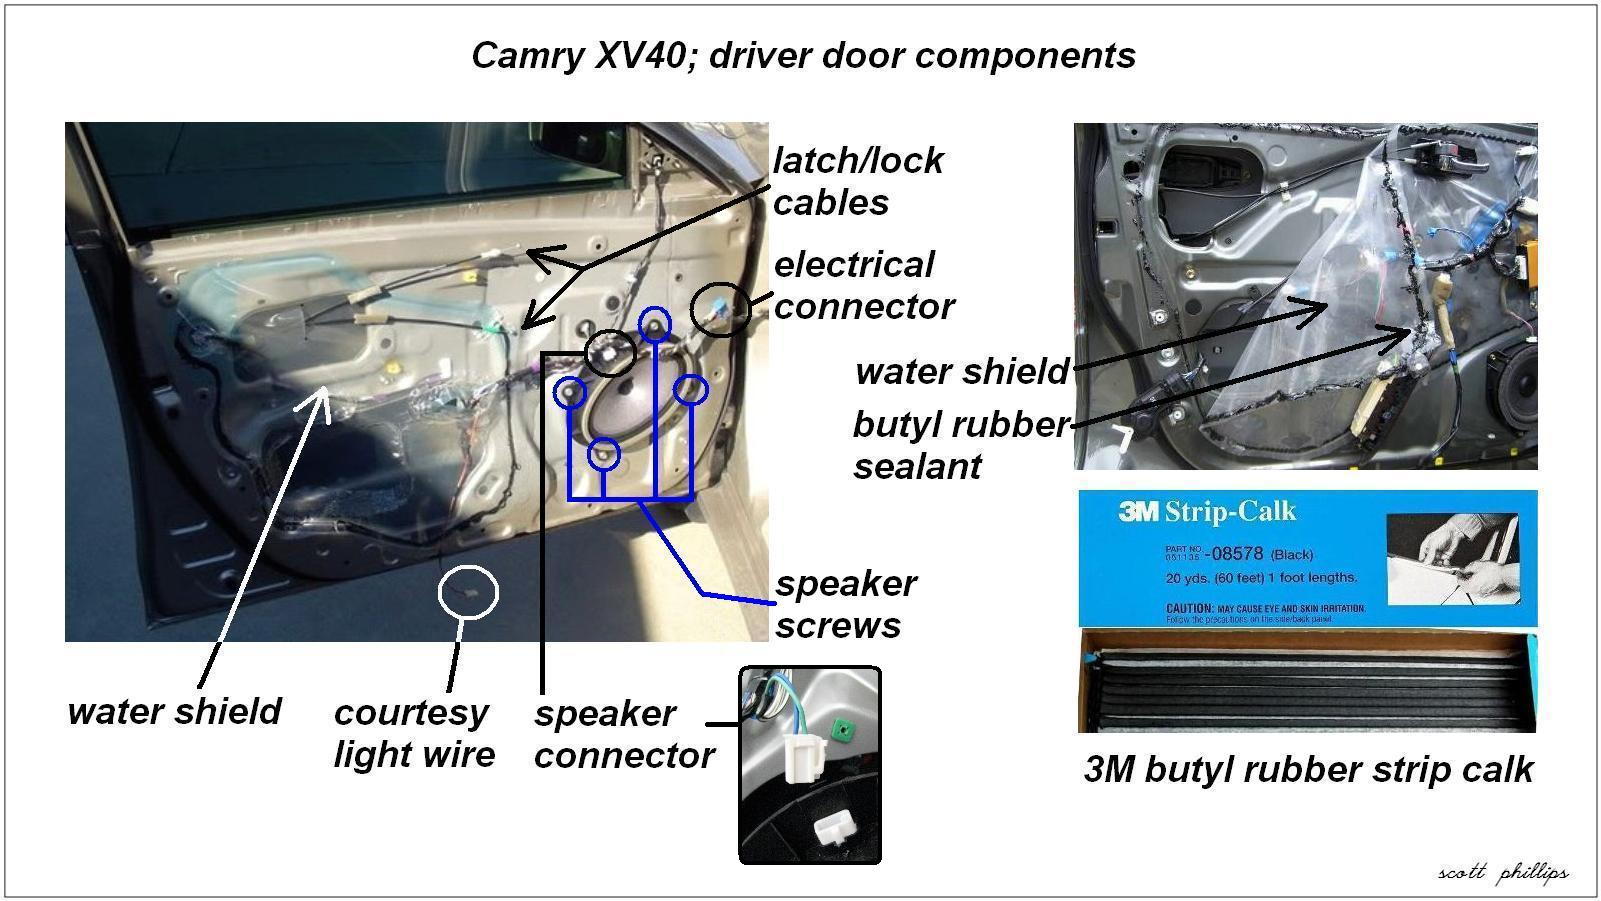
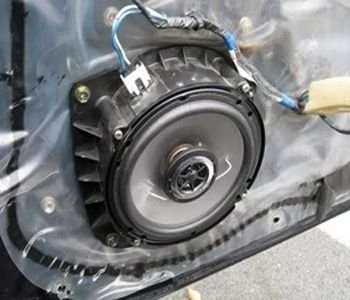
Step 2 – Remove speaker and water shield
- Press the lever on the speaker connector and disconnect it.
- Remove the four 10mm speaker bolts.
- Carefully peel off the water shield, and feed the latch as well as lock cables through the slot in the water shield.
Step 3 – Unclamp and raise window glass
- Press the lever on the electrical plug and disconnect it from the regulator motor.
- Using the 10mm wrench, loosen the two glass clamp bolts.
- Slide the window glass up and out of the clamps to the top of the window frame, and hold it.
- Loop several pieces of painter's tape over the top of the window frame and secure it to the glass, so that it will not fall.
Step 4 – Remove window regulator
The upper left regulator bolt is fitted into a keyhole slot for ease of removal and installation. When the other five bolts are removed, the regulator will hang from the upper left bolt in the keyhole slot.
- Loosen, but do not remove, the upper left bolt in the keyhole slot.
- Remove the other five regulator bolts.
- Lift the regulator out of the keyhole slot and remove it from the door.
Step 5 – Install new regulator
- Transfer the keyhole slot bolt to the new regulator and turn it in about half-way.
- Place the regulator inside the door and hang it from the keyhole slot bolt.
- Install and tighten the other five regulator bolts.
- Tighten the keyhole slot bolt.
Step 6 – Clamp window glass and test the operation
- Remove the tape and gently lower the glass into the two clamps.
- Tighten the glass clamp bolts.
- Connect the electrical plug to the regulator motor.
- Temporarily connect the electrical plug to the power window switch panel, and check that the window travels fully without binding.
Pro Tip
Be careful not to over-tighten the glass clamp bolts, as it could crack the glass.
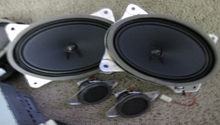
Step 7 – Install speaker
- Install the speaker and tighten the four bolts.
- Connect the speaker's electrical plug.
Step 8 – Install water shield
To prevent water ingress into the cabin, the butyl rubber sealant should form a continuous bead around the sides and bottom of the water shield.
- If needed, apply new 3M butyl rubber strip-calk 08578 to the door.
- Feed the latch/lock cables through the slot in the water shield.
- Line up the water shield and carefully press it against the butyl rubber sealant.

Pro Tip
Butyl rubber is excellent sealant and is also the most maddening stuff on Earth to work with. It will stick to everything it gets in contact with. Wear disposable gloves and try not to let anything touch the exposed sealant on the door or water shield.
Step 9 – Re-install door trim
- Connect the latch/lock cables and electrical plug.
- Hang the trim panel on the upper door frame.
- Connect and re-install the courtesy light.
- Push the lower nylon fasteners into place.
- Tighten the two screws in the pull handle and snap on the handle cover.
- Tighten the screw in the latch lever and snap in the trim piece.
- Snap in the front pushpin and the sail trim piece.

Featured Video: How to Install/ Replace Power Window Regulator 02-06
Related Discussion
- Help Me Find a Window Part - CamryForums.com