Toyota Camry: How to Blackout Headlights
If you're wanting to dress up your Camry in a few minutes, some black vinyl, soapy solution, a squeegee, a razor blade and a hairdryer will do the trick. It's easy and takes hardly any time.
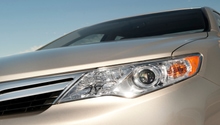
This article applies to the Toyota Camry (1997-2011).
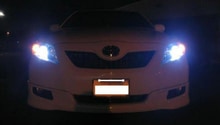
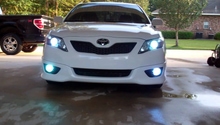
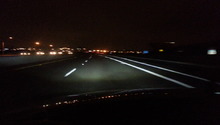
Nothing is as fun and satisfying as showing off your beautiful ride to friends and strangers. Whether it's at a car show, a drive-in or simply in a parking lot at a party, you can't beat the ooh's and aah's of those adoring your car and your work. One of the cool enhancements you can add is to "blackout" your headlights. No doubt you've seen them and thought, "That would really be cool on my car." The good news is that it's really easy to do and doesn't take all that much time. Read on for some simple step-by-step instructions to make this beautiful adjustment to your headlights.

Materials Needed
- A headlight blackout tint kit
- A small squeegee
- Cleaning fluid
- Application fluid
- X-Acto knife
- Hairdryer
- Water and isopropyl alcohol (optional)
Note
- The ideal temperature range for application is between 70 and 80 degrees F.
- Do not apply the film during periods of very high relative humidity, and definitely not when it is raining.
- The blackout tint kits come in various sizes. Measure your headlights to ensure you order the right kit.
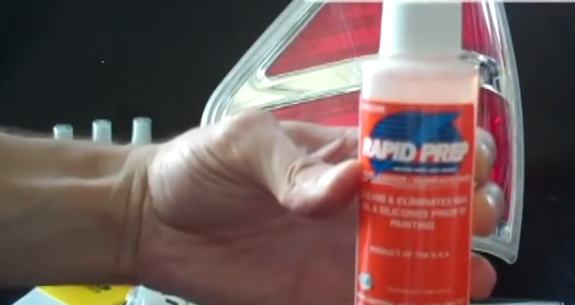
Step 1 – Begin by thoroughly cleaning the surface of your headlight
Some recommend a cleaning solution like Rapid Prep, which is very good. But in reality, any good cleaning solution will do the trick. You can make your own with a 2:1 mixture of water to isopropyl alcohol.
- Make sure you use a clean, lint-free cloth to clean the application area.
- The surface must be thoroughly lean and dry prior to application.
- Make sure all oils and residues have been removed before proceeding.
Step 2 – Apply the tint film to the light
- Spray a generous amount of the application fluid to the light. This will allow you to re-position the film as you go on in the process.
- Also spray a liberal amount of the application fluid on the outside of the film you are applying.

Pro Tip
You can use a solution like Rapid Tac or simply make your own solution of 10:1 water to mild soap solution.
Step 3 – Re-position the film to align with the edges
After applying the film to your headlight, begin the process of aligning the film with the edges of your light.

Figure 3. Re-position if necessary to get the correct alignment. 
Figure 4. Smooth out and align with edges.
Pro Tip
The film may appear to be short or too large at this state. Don't worry; this is because the film has yet to be heated, stretched or trimmed.
Step 4 – Using your squeegee, begin to smooth out any wrinkles, creases or bubbles
- Move from the center to the outer edges.
- Continue to spray the application fluid on the outside of the film as you work. This will keep your from scratching the film as you smooth it out.

Figure 5. Smooth out any wrinkles or bubbles, moving from the center out. 
Figure 6. A hairdryer will help with this process.
Pro Tips
- Using a heat source like a hairdryer will aid greatly in the process of stretching and/or smoothing out the film on your headlight.
- If possible, turn your headlights on. This will help increase the surface temperature of your light and will aid you in this particular step of installation.
Step 5 – If present, trim any excess film that might be hanging over the edges
Excess may be present because you heated the film, and in the process it stretched. Simply use a razor blade or X-Acto knife to trim away the extra.

Step 6 – Allow the film to dry for a minimum of 30 minutes
Carefully wipe off any excess solution.

Figure 8. Make sure the surface is dry. 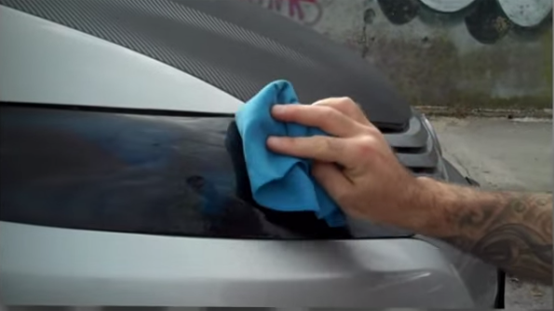
Figure 9. Wipe off any excess moisture before finishing.
Pro Tip
You may not have gotten all the moisture removed between the film and your headlight. If so, some fogginess may occur. This is normal. It will disappear with a few days to a few weeks. If there are still any ripples, they will also disappear during that same time.
Featured Video: How to Blackout Headlights on Camry
Related Sites
- RVinyl Instructional Video - RVinyl.com
- RVinyl Headlight Blackout Kits - RVinyl.com
- Headlight Tint Installation Guide RVinyl.com
- Blackout Headlight Tint Installation Video - Ewindowtint.com