Toyota Camry: How to Repair a Tire Leak
Got a leaky tire? Here's how to fix it yourself in the comfort of your own garage or driveway.
This article applies to the Toyota Camry 4th, 5th, and 6th generation (1997-2011).
Tire leaks are annoying, and for the most part, inevitable. At some point every driver runs over a piece of glass, a nail, or some other sharp object without a moment's notice. The result is usually a slow release of air from your tire, or sometimes a very quick release, that can leave you stranded on the side of the road. Getting a tire repaired by a professional usually isn't too expensive, but it's also a simple process that any person can do at home if he or she wants to save some time and money.

Materials Needed
- Tire repair kit
- Hydraulic jack and jack stands
- Spray bottle with soap and water mixture
- Tire iron
- Needle nose pliers
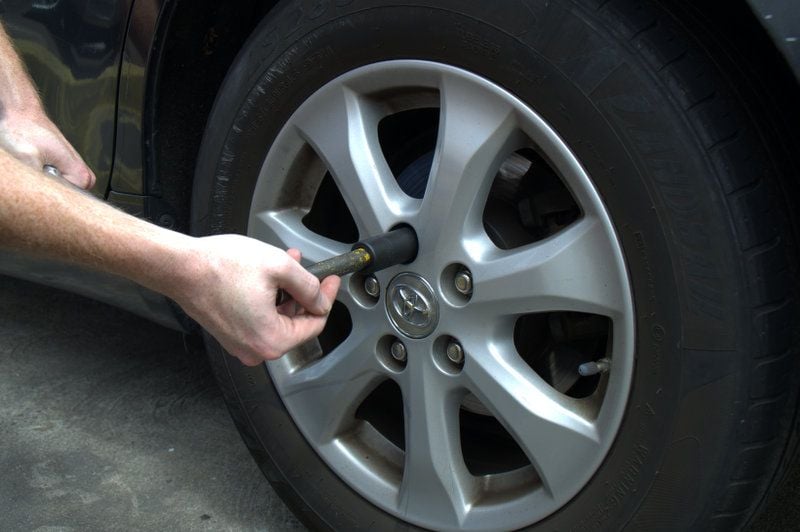
Step 1 – Remove the wheel and tire
- Use a tire iron to break the wheel's lug nuts free while the car is on the ground.
- Jack up the car and set it down on jack stands.
- Then completely remove the lug nuts and dismount the wheel.
(Related Article: How to Jack Up Your Car - CamryForums.com)
Step 2 – Find source of the leak
- First visually inspect the tire for the source of the leak. A nail or other sharp object that has punctured the tire will be easy to spot.
- Remove the nail or sharp object with a pair of needle nose pliers.
- If you can't find the source of the leak, you can locate it using a spray bottle filled with a soap and water mixture. Spray the tire one section at a time and look for any air bubbles that form.

Step 3 – Prep the tire for repair
- Insert the reamer tool from your tire repair kit into the punctured area.
- Twist and push the tool in until it has reached the inside of the tire.
- Then repeatedly lift the tool up and down in a sawing motion. This will smooth out the hole and ensure a better seal.

Step 4 – Plug the tire
- Pull the reamer tool out of the tire.
- Feed a repair cord through the eyelet of the T-handle tool.
- Insert the cord into the hole in the tire, and then pull it out until about a quarter of the cord is sticking out.
- Cut off the portion of the cord that is sticking out.
- Apply the rubber cement from your repair kit around the hole and let it fully dry.
- Once dry, spray the area with soapy water again to make sure there is no more air leaking.
- Inflate the tire to manufacturer's specs.
- Remount the tire and tighten the lug nuts.
- Lower the car and torque the lug nuts to manufacturer's specs.

Featured Video: How to Fix a Tire Leak
Related Discussion and Video
- Tire Pressure Monitor System Error - CamryForums.com
- How to Fix a Leaking Tire Videos - YouTube.com