Toyota Camry: How to Replace Air Filter
Your Camry's engine air filter is a lot like its lungs; it cleans the air that circulates into and through your engine. The dirtier your filter, the more you strain your engine, causing a sluggish engine, and the worse your gas economy will be.
This article applies to the Toyota Camry 4th, 5th, and 6th generation (1997-2011).
It's recommended that you change your filter at least once a year or between every 12,000 and 20,000 miles, whichever comes first. Some dealers recommend timing it to your third oil change if you change your oil three times in a year, or even more frequently depending on the conditions in which you drive. The worse the conditions, the more often you should change your air filter. Replacing your air filter is a fairly inexpensive DIY project that even the most novice of car owners can—and likely should—do.

Materials Needed
- New air filter (your owner's manual will include information about what size filter you need)
- 10mm wrench (for 2002-2011 model year Camrys)
- Vacuum (optional)
Step 1 – Prepare to change air filter
- Open the hood and lock it into place with the hood support bar.
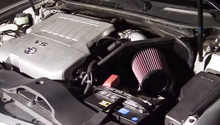
- Locate the air filter case, which is directly behind the battery. It looks like a black box. Note that there is a hinge on the left side of it and two bolts (one that is visible in Figure 1) on the right side of the case.
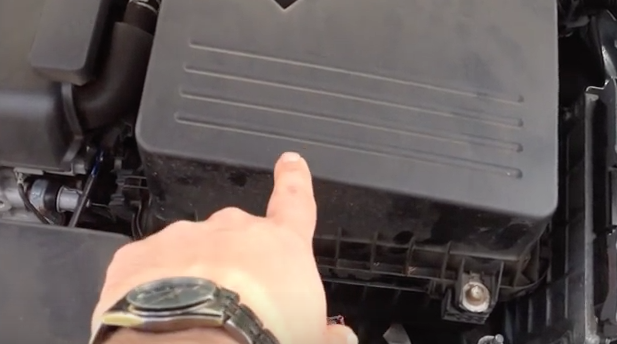
Step 2 – Open air filter case
Use 10mm wrench to loosen and remove the two bolts (on right-hand side of casing). In the 1997 to 2001 model year Camrys, there are tabs that you pull instead of bolts that you loosen and remove.

Open the air filter case by lifting on the right side of it and pulling up. There should be a hinge on the left side of the case. You only need to open the lid high enough so you can reach inside the box and remove/insert the air filter.

Step 3 – Replace air filter
Pull out the old air filter. It just rests inside the case, so there is nothing holding it in place. You may want to vacuum out the case before inserting a new air filter. This isn’t a necessary step, but you may want to depending on how dirty the inside of the case is.

Insert new air filter. There is a groove on the edge of the air box that that the filter sits in, so just wiggle the filter around until it slips into place. If you are unsure about this, just try to close the air box cover and if it doesn't sit flush, the filter isn't installed correctly.
With the filter in place, re-install the air box fasteners (clips or bolts, depending on model year). Then you are done!

How to Replace Air Filter
Related Discussions
- Two Air Filters - CamryForums.com
- Air Cleaner Nuts - CamryForums.com
- Changing Air Filter - CamryForums.com
- Air Filter Sizing - CamryForums.com