Toyota Camry 1997-2001: How to Replace Clock
Maybe you've noticed that the clock in your Camry is inaccurate, or maybe it intermittently turns on and off. No matter the reason, even a novice DIY'er can replace the clock in no time.
This article applies to the 4th Generation Toyota Camry (1997-2001).
It doesn't happen often, but sometimes the clock display in a fourth generation Toyota Camry will start to die out. Sometimes the clock starts keeping inaccurate times, losing a few seconds or minutes here and there, or sometimes it doesn't even work at all. With clocks built into most cell phones, you may not even notice that there's something wrong with the clock in your car. But when you do take a glance at the time, only to realize you're late for that important meeting, removing it, diagnosing it, and fixing the problem is a fairly simple job.

Materials Needed
- Small Phillips screwdriver
- Flat head screwdriver
- Needle nose pliers
Step 1 – Prepare to remove the clock
Let your car run for a few minutes, or plan to remove the clock right after you've returned home. Unlike other automotive DIY projects, you want your car to be warm for this project. The warmer the console, the less chance there is of accidentally cracking the bezel. Make sure you have the tools you need on hand as well.
Step 2 – Remove the bezel screws
- Locate the Phillips screws holding the instrument cluster bezel in place. There are two above the cluster's window.
- Use a Phillips screwdriver to remove each screw, set them aside, and make sure not to lose them.

Figure 1. Locate the instrument cluster bezel screws. 
Figure 2. Remove the bezel screws using a small Phillips screwdriver.
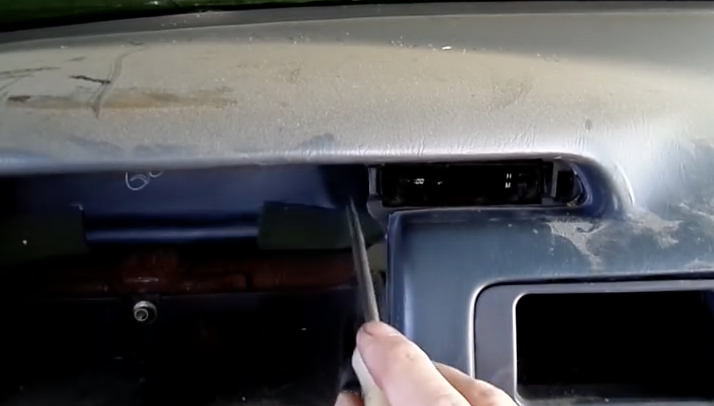
Step 3 – Remove the bezel
- Use a flat head screwdriver to pry out the bezel from the left or right size. You'll find an opening near the vents where you can insert the screwdriver, and you will need to work both sides of the bezel to pop it out.
- Remove the bezel's retaining clips near the vents using the flat head screwdriver.
- Then slip the bezel free from its tabs, and slide it out of the dash. Set it aside and be careful not to damage it.

Step 4 – Remove the instrument cluster
- Use your Phillips screwdriver to remove the instrument cluster's four mounting screws.
- After the screws have been removed, slide the cluster out of the dash. You do not need to unplug the cluster's wire harness connectors to access the clock. You can let the cluster hang there, but push it over to one side so you have enough room to access and remove the clock.

Step 5 – Undo the retaining clips
- Use the flat head screwdriver or a pair of needle nose pliers to undo the retaining clips on each side of the clock. You should hear a click when the clips have been unlocked.
- Once the clips are free, push the clock inward. You don't need to use much force.
Step 6 – Remove the old clock
- To access the back of the clock, press on the air vent located behind it. You don't need to use much force, and there should be a lot of give with this vent. Push in far enough so you can reach behind the clock.

- Use your needle nose pliers to unplug the clock's wire harness connector. Clamp down the locking tab to free the connector, and then unplug it.
- The clock has only one wire harness connector, so remove the clock once it has been unplugged.

Step 7 – Install the new clock
Install the new clock in reverse order to the steps above.
- Plug in the wire harness connector to the new clock.
- Insert the clock into the dash, and pull on the air vent to hold the clock on place.
- Secure the lock using its retaining clips.
- Re-install the instrument cluster.
- Replace the bezel, and make sure the tabs as well as retaining clips are snapped in.
- Replace the two Phillips screws holding bezel in place.
Featured Video: Camry Clock Removal and Repair
Related Discussions
- 1999 Camry Clock Repair - CamryForums.com
- 1997 Camry Digital Clock Fell Inside Behind Dash - CamryForums.com