Toyota Camry 1997-2001: How to Replace Oil Pan and Gasket
Hey, at least you're getting a complimentary oil change when you do this repair!
This article applies to the 4th Generation Toyota Camry (1997-2001).
So you have found some oil leaking from the oil pan area. Don't fret, this is probably the easiest oil leak to fix and one that should not have long term ramifications. For most vehicles, it's simply the oil pan gasket that just needs to be replaced. However, some vehicles do damage the oil pan by hitting road debris, causing the pan to crack. As long as you have been adding oil to maintain proper levels, there should not have been any other issues caused by this leak. You do not need any special tools or mechanical abilities to replace the pan yourself. You will only need a few supplies along with an hour or so, and you'll be back on the road happy that you did it yourself. Also, it will save a considerable amount of money that you would have otherwise given to a professional to do.

Materials Needed
- Hydraulic floor jack
- Jack stands (at least 2)
- Ratchet and socket set
- Oil pan (if needed)
- Oil pan gasket
- Oil filter
- Replacement oil
- Oil catch pan or container
- Exhaust gasket (optional)
- Penetrating oil
- RTV sealant (or similar)
The most difficult issue you will run into is dropping a part of the exhaust that blocks the current oil pan. You may want to get some replacement bolts for the exhaust bracket as they tend to rust out with age. It is a good idea to do some pre-work the night before by spraying these bracket bolts with a penetrating oil and letting them soak overnight. Also, the oil pan replacement is optional. You should clean up your pan really well and determine if the leaking oil is a result of a cracked pan, or if it is simply from the seal gone bad. The 1999 Camry (and possibly others) may not have used a gasket, but rather a liquid seal. The choice is yours, but aftermarket gaskets do exist for all models.
Step 1 – Lift the car
- Lift the car at the proper jacking location and place on jack stands.
- You only need to lift the front; however, the job is a little easier if you can set the entire car up on four jack stands.
- Never work under the car with only the floor jack supporting it.
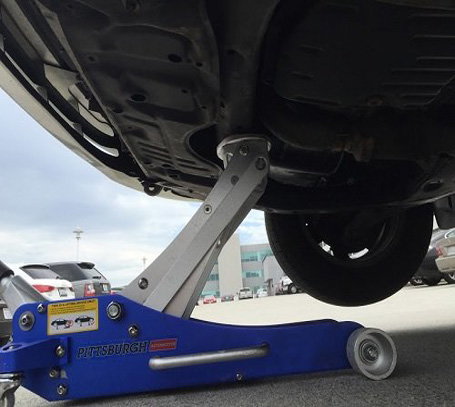
Figure 1. Utilize the front crossmember jacking point. 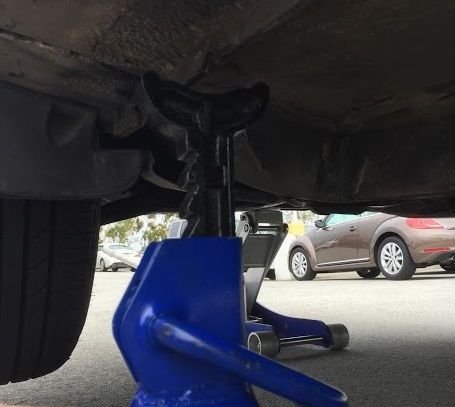
Figure 2. Use the reinforced part of the "pinch welds" for jack stand placement.
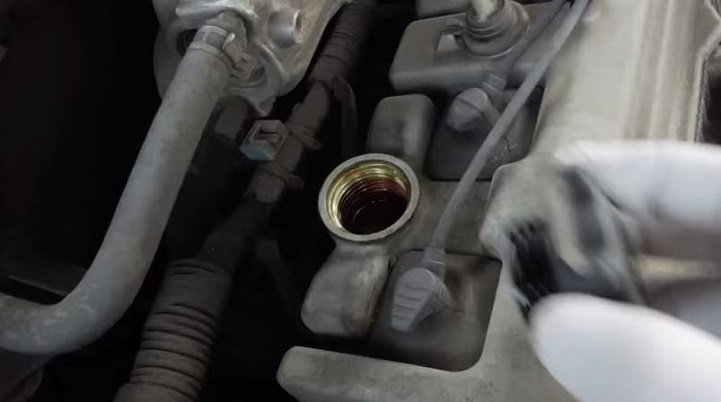
Step 2 – Open hood and remove oil filler cap
- Pull the hood release latch and lock open the hood.
- Remove the oil filler cap to allow the oil to drain quicker.
Pro Tip
Warm oil drains much faster than cold oil. You may wish to let the car warm up a little before draining the oil, but you also have to consider the exhaust pipe that you will have to drop, so keep that in mind.
Step 3 – Drain the old oil
- Slide your drain pan into position under the drain plug.
- Use a 14mm socket and remove the oil drain plug from the drain pan.
- Let the old oil drain completely.
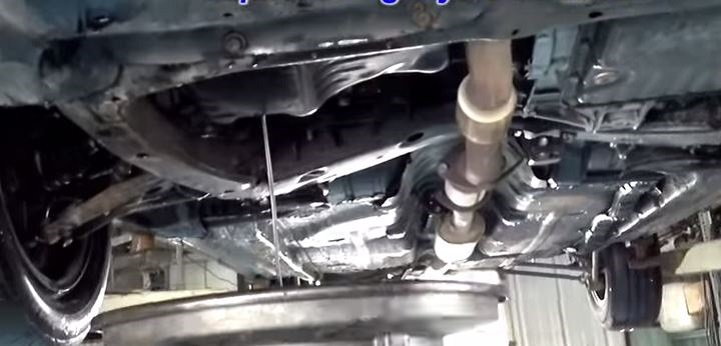
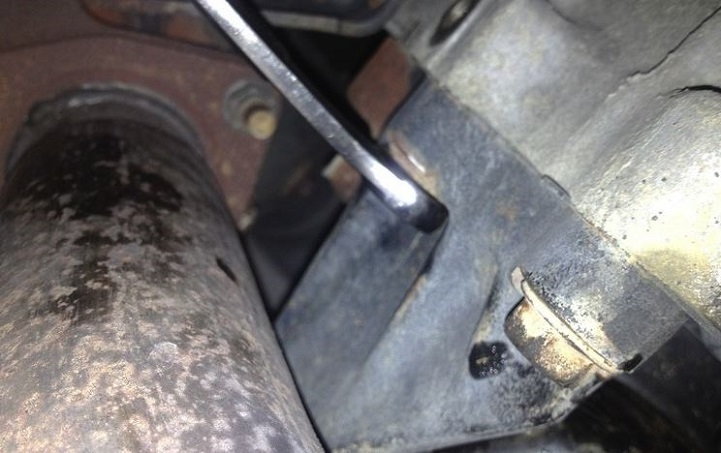
Step 4 – Drop exhaust pipe
There are a few different methods you can use to tackle this part of the job. As this is probably the most difficult part of this job, it is still very easy. There are only a few bolts that you need to remove.
- You can disconnect the exhaust at the down pipe from the exhaust manifold if all of your other exhaust bolts are not rusted.
- If you use this method, invest a few bucks in a new gasket that sits between the manifold and the down pipe.
- If your bracket bolts are too rusty, you should remove them, drop the pipe from those points and replace those rusty bolts.
- Use a 14mm socket on the bolts that connect the exhaust bracket to the transmission and a third bolt on the engine near the oil pan.
- Set the pipes aside, and now you can not get down to business.
Step 5 – Remove the oil pan bolts
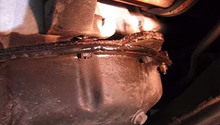
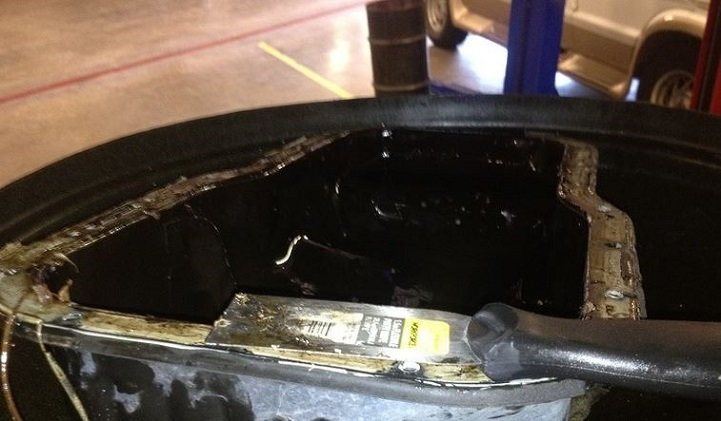
There are approximately 20 bolts that connect the oil pan to the bottom of the engine block. Remove each of these bolts while supporting the oil pan itself, especially if you are not replacing the oil pan with a new one. Once the bolts are out, lower the pan to the floor. Use a soft putty knife to scrape off the old sealant or gasket remnants on the pan and the bottom of the block. This is aluminum, so take care not to gouge the metal.
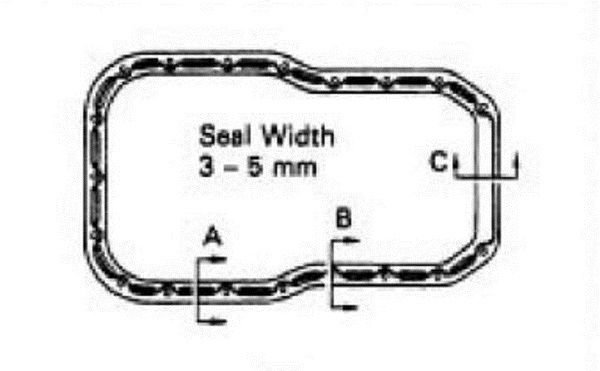
Step 6 – Add new sealant or gasket to oil pan
Use a good quality RTV or other type of sealant with your drain pan, unless you are using a gasket. Permatex is similar to the OEM sealant, but it has a 24-hour cure time before any oil can be added to the pan. There is a different type of Permatex that has a quicker cure time. RTV has a 24-hour cure time.
- If using a gasket that is likely made from cork, you will have to re-tighten the pan bolts after a couple of days as this gasket will compress.
- Be sure to properly torque the pan bolts to manufacturer's specifications which should be 48 pound-inch (4 lb/ft).
Step 7 – Replace the oil pan, oil, and filter
- Double check that the oil pan bolts are torqued to 48 pound-inch (4 lb./ft).
- If you used a sealant, follow the manufacturer's cure time before replacing the oil.
- Replace the oil filter if you haven't done so already.
- Replace the oil drain plug in the pan if you haven't done so already.
- Add new oil until the proper amount has been reached based upon a new, empty filter (if you replaced it), or based upon no filter if you did not replace it (4.5 quarts).
- Start the vehicle, check for leaks, warning lights, and oil pressure indicators.
- If all is well, drop the car and take her for a test drive.
- Re-check for any leaks after the car has been sufficiently heated up.

Featured Video: Oil Pan Gasket Change on Camry
Related Discussions
- Replacing Oil Pan and Gasket - CamryForums.com
- Oil Pan Gasket for 98 2.2L - CamryForums.com
- Oil Pan Gasket Seeping - CamryForums.com