Toyota Camry 2002-2011: How to Change Your Oil
There's no getting around the fact that if you own a car, then you need to change its oil. Rather than pay a mechanic to do it, consider doing it yourself. You likely have the tools you need, and it isn't as messy or tedious as you may think.
This article applies to the Toyota Camry 5th and 6th generation (2002-2011).
How often you change your oil likely depends on who you ask. A mechanic may suggest changing your oil every 3,000, 5,000, 7,500 miles, or even when an oil light indicator turns on. Your owner's manual may even suggest changing your oil at a different interval. But regardless of how often you change it, remember that the cleaner the engine oil is, the more efficient the engine operates. Consider changing your oil more frequently than recommended if you tend to take shorter trips, encounter stop-and-go traffic, drive in dusty or dirty conditions, use your car to tow something, or drive at speeds in excess of 55 miles per hour over sustained periods of time.

Materials Needed
- Up to six quarts of oil (depending on how much oil your car uses)
- New oil filter and O-rings
- Jack and jack stands
- 14mm socket with 3/8" drive ratcheting wrench
- 3/8" drive extension bar
- Oil filter wrench
- Container and catch pan
- Small flat head screwdriver or tweezers (optional)
- Funnel
Step 1 – Prepare to change oil and lift car
Turn on your car and let the engine run for a minute or two. This warms up your engine and will help your old oil drain more quickly. Engage the parking brake and chock the rear wheels, then shut the car off. This will help keep the car from moving when you’re actually changing the oil. Open hood and remove the oil filter cap. Remove it by turning it counterclockwise.
Use a jack to lift on the front passenger's side of your Camry, and secure it with stands.
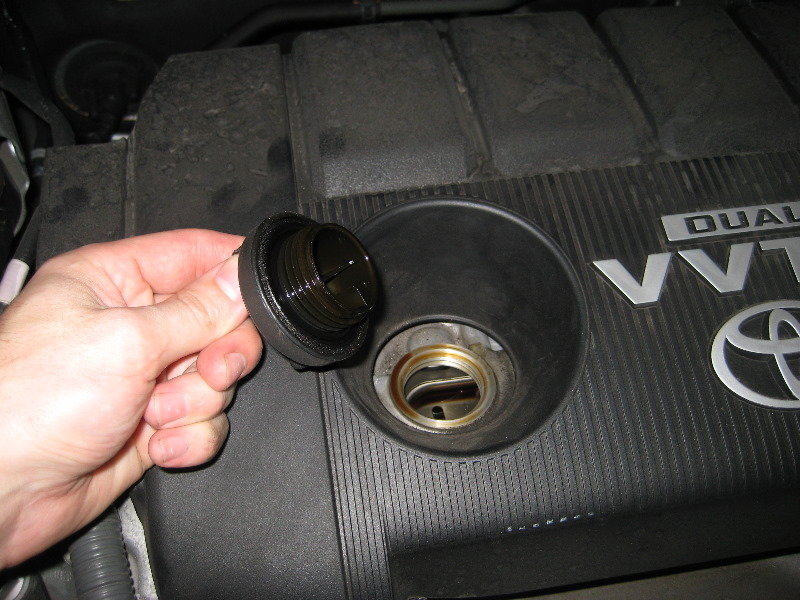
Figure 1. Remove the oil filter cap and set it aside. 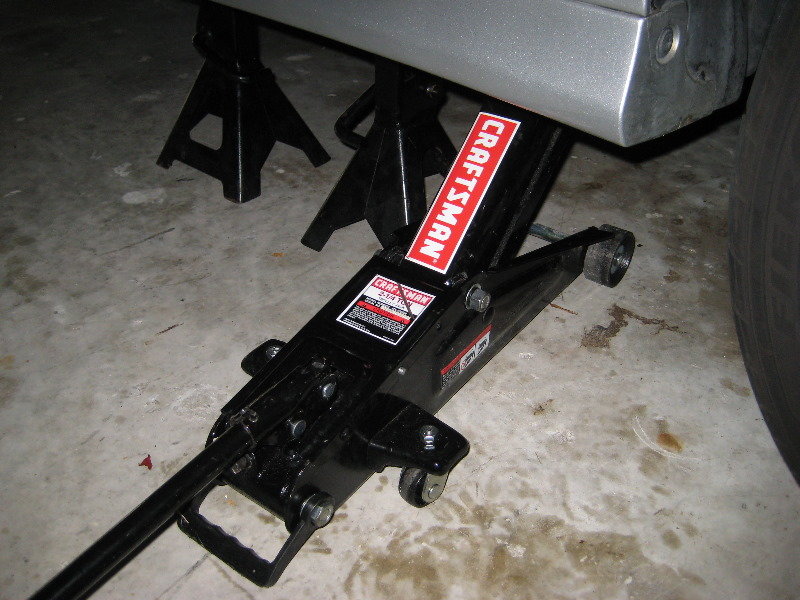
Figure 2. Jack up passenger side of car. Be sure that you engaged the parking brake in Step 1 before you jack up your car.
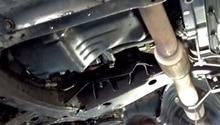
Step 2 – Locate oil pan, oil drain bolt, and oil filter cartridge housing
Get beneath the passenger's side of your Camry’s engine and look for the oil pan (it is likely made of black metal), oil drain bolt (likely silver), and oil filter cartridge housing (likely black plastic). The oil drain bolt in most Camry models faces the rear of the vehicle; the oil filter housing is on the side of the oil pan that is closest to the front bumper.

Step 3 – Remove and replace oil drain bolt
Use 14mm socket and ratcheting wrench to loosen oil drain bolt (turning it counterclockwise). Position container beneath the oil pan and use your fingers to remove the oil drain bolt completely. The oil may be warm, so be careful not to let it touch your skin. After you’ve removed the oil drain bolt, the old oil will drain from your car.
Let oil drain fully, or until nothing is dripping out of the oil pan. Afterwards, replace the oil drain bolt. Use the 14mm socket to tighten oil drain bolt into place.
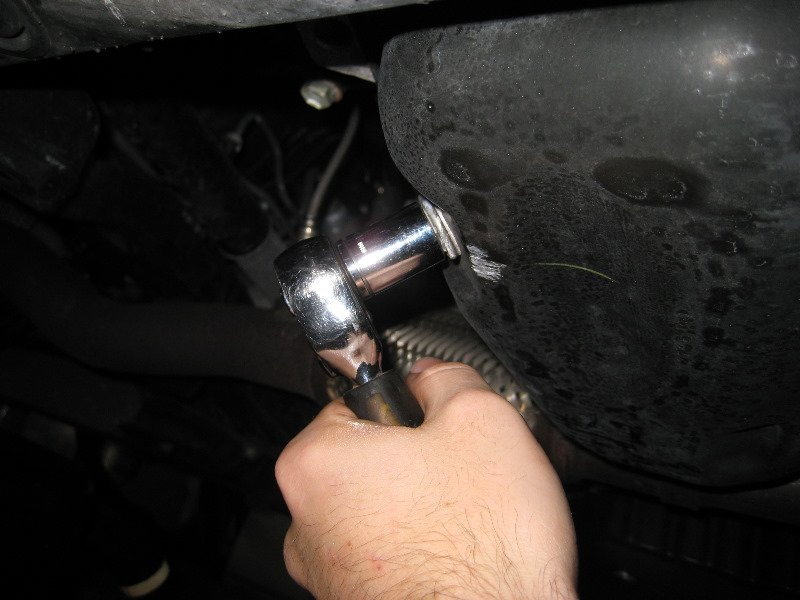
Figure 4. Use 14mm socket to loosen oil drain bolt. 
Figure 5. Position container beneath oil pan.
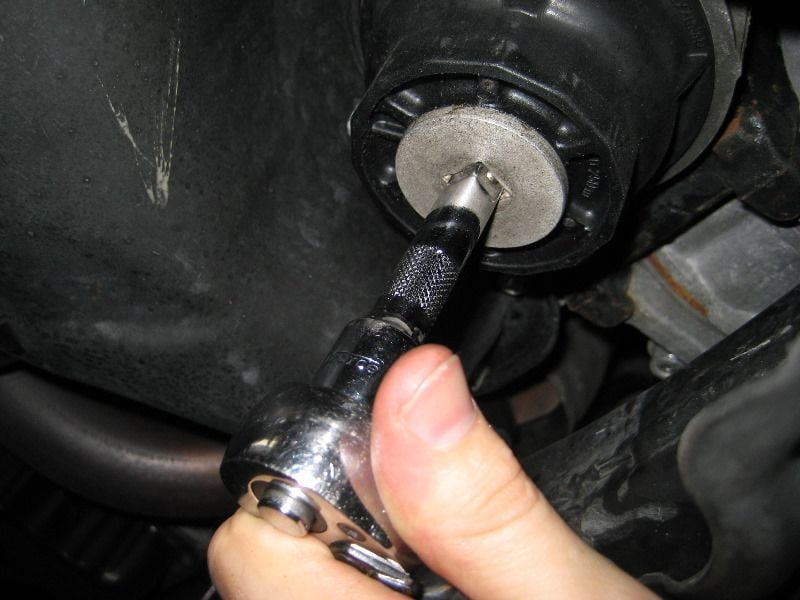
Step 4 – Remove oil filter housing drain plug
Use your 3/8” drive ratcheting wrench and extension bar to remove the oil filter housing drain plug (turning it counterclockwise) and set it aside. Position container beneath the filter housing to catch any oil that drains out.
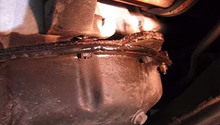
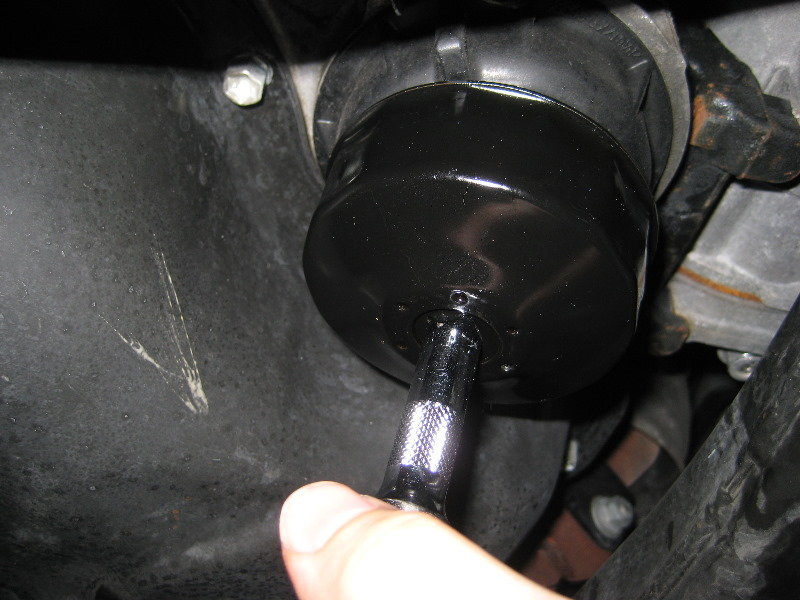
Step 5 – Remove oil filter housing and O-rings
Use oil filter wrench to remove oil filter housing (turning it counterclockwise) and then remove the oil filter. You can throw it away since you’ll be replacing it. Next, remove the old rubber O-rings. If you can’t remove them by hand, then use a small flat head screwdriver or pair of tweezers to pry up the O-rings (there are two: a larger one beneath the filter housing’s threads and a small one near the drain plug’s threads). You can throw them out when you’ve removed them since you’ll be replacing them.
Step 6 – Replace oil filter housing, O-rings, and oil filter housing drain plug
Rub your new O-rings with a little motor oil, and put in place on new oil filter housing. Insert the new oil filter. Use oil filter wrench to tighten filter housing back into place. Replace the oil filter housing drain plug, and tighten by hand until you can’t turn it by hand anymore.
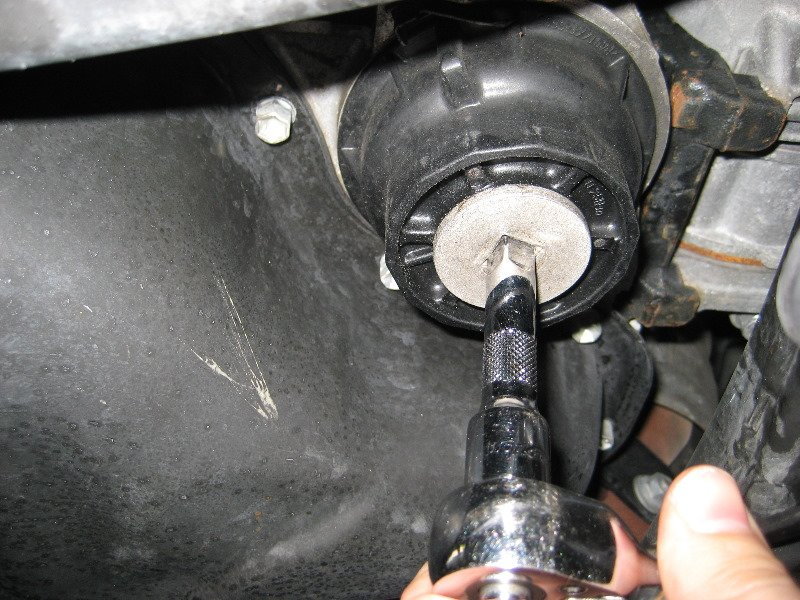
Figure 8. Use oil filter wrench to tighten filter housing back into place. 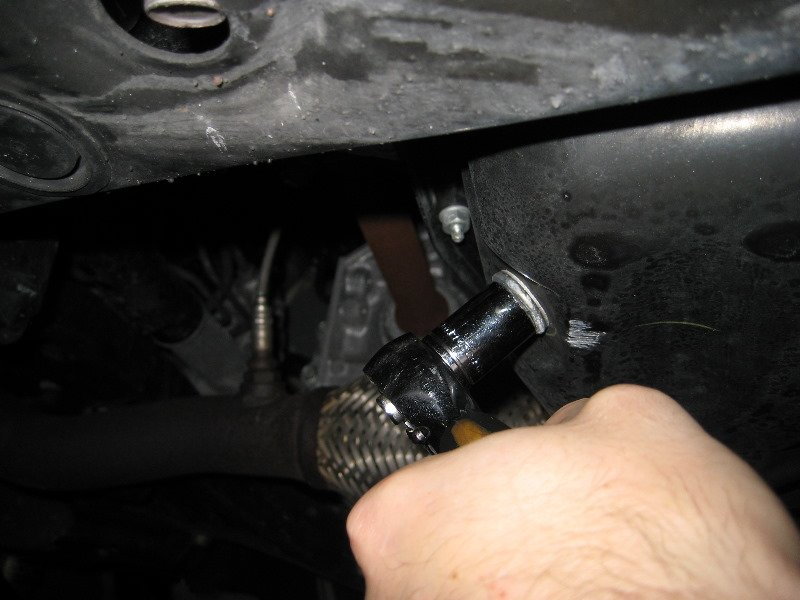
Figure 9. Tighten 14mm drain bolt by hand.
Step 7 – Prepare to add oil and add oil
Remove your tools and container from beneath your car, and then carefully lower your vehicle. Push the jack aside since you no longer will need it.
Put funnel into oil filter hole and slowly pour in between four and five quarts of oil. Most mechanics recommend using 10W-30 or 5W-30 oil. Do not overfill because having too much oil can cause undue pressure and affect engine performance. Turn on your car and let the engine run for a minute or so. Turn off your car and pull out the oil dipstick. Check the oil level. Replace oil dipstick and add more oil. Repeat this until your oil dipsticks indicates full. Replace oil filter cap and close hood when done.
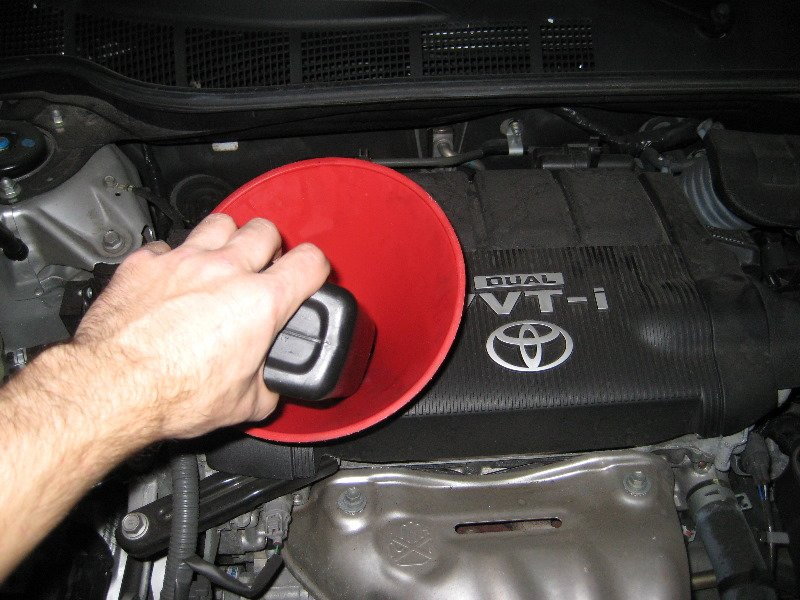
Figure 10. Add between four and five quarts of oil. 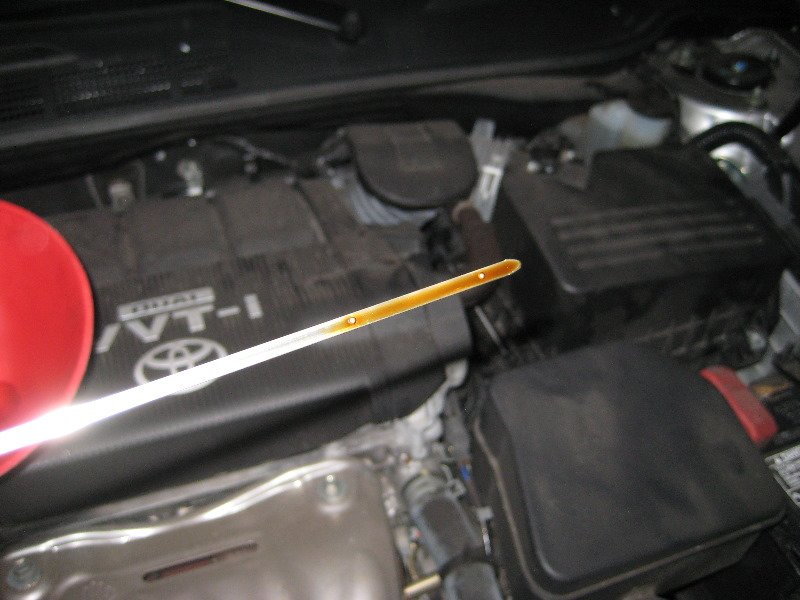
Figure 11. Add oil until your dipstick registers oil level as full.
Featured Video: Oil Change on Four Cylinder Camry
How to Replace Engine Oil Filter
Related Discussions and Video
- 2010 Toyota Camry Oil Change - CamryForums.com
- Oil Capacity for 2011 2.5L 4Cyl - CamryForums.com
- Which Motor Oil? - CamryForums.com
- Best Oil for Your Camry - CamryForums.com
- 2011 Camry Oil Change 4Cyl LE - 4Cyl LE - CamryForums.com
- Oil Change in V6 Engine - YouTube.com