Toyota Camry 1997-2001: Engine Leaks Diagnostic Guide
An engine leak in your Toyota Camry can start with a stain and end with a blown motor. The best pieces of maintenance you can periodically do is checking for leaks. Here's how to diagnose a leaking engine.
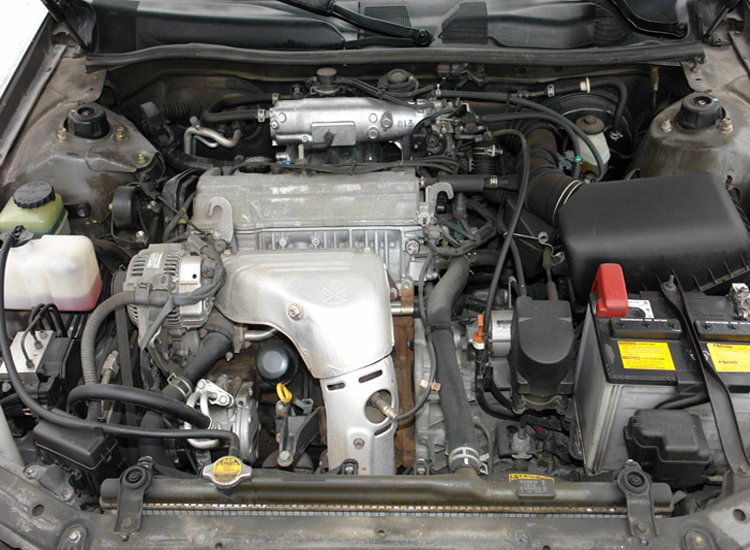
This article applies to the 4th generation Toyota Camry (1997-2001).
Finding the source of an engine fluid leak can be difficult because parts of the engine are not visible in the engine bay. If you've been driving with the fluid leak, you will find that the fluid has made its way back towards the rear of the car. This creates a mess in a large area and makes it difficult to locate the actual source of the leak. Fluids can wreak havoc on hoses and sensors, causing them to crack, break, or fail. When fluid comes into contact with these components, more leaks can develop as well as intermittent electrical problems. There are several methods used to locate the source of a leak quickly and accurately. Anybody with the time and a basic understanding of the fluids used in an engine can locate a leak on their Toyota Camry. Here's how to diagnose your engine leak quickly before it escalates to a much worse headache.

Materials Needed
- Engine degreaser
- Scrub brush
- Water
- Flashlight
- Talcum powder
- UV dye and light
- Floor jack
- Jack stands
- Rubber gloves
- Safety glasses
- Shop rags
Step 1 – Check fluid levels
Low fluid level could mean you have a big leak.
Check all of the fluid levels on the vehicle. Wear rubber gloves, safety glasses, and have rags handy. Use the dipstick to check for the proper level. The marks will read COLD, meaning this is the proper level when the engine is cold. The mark may also read FULL, indicating the fluid level does not change with temperature. If you want to check the transmission fluid, first warm the engine to operating temperature. Park on a level surface, shift through every gear before returning to park, and then check the dipstick.
Know what type of fluid your vehicle requires. This information can be found in the owner’s manual. Also, knowing what each fluid looks like helps in determining where the leak is coming from.
- Engine oil: It will appear light brown to black in color depending on its age.
- Fuel: It will appear light brown and is accompanied by a strong fuel odor.
- Coolant: It may appear green or orange depending on what type of antifreeze was added. It may also be close to clear depending on how much water is mixed into it.
- Transmission fluid: This fluid will probably be a dark red color. It may be brown if it's contaminated.
- Power steering fluid: Power steering fluid is similar in color to new oil, maybe even clearer. Some manufacturers recommend transmission fluid be used with the power steering system.
- Brake fluid: Also similar in color to engine oil. The fluid will appear darker as it ages. Brake fluid is corrosive to paint, so keep that in mind when dealing with it.

If all fluids have been properly checked, go to Step 2.
Step 2 – Visually inspect for leaks
Time for your flashlight to shine.
If you noticed one of your fluid levels is low, expect it to be leaking. A bright flashlight is one of the most important tools while making your inspection. Start at the top of the engine. Look at the top and sides for dirt buildup or wet areas. Fluid attracts dirt and makes it stick to the location of the leak. Check around hose connections, such as radiator hoses, fuel hoses, and oil hoses.
If at any time you suspect fuel is leaking, do not drive the vehicle until the leak has been fixed. Leaking fuel is a fire hazard on a hot engine.
Move to the lower side of the engine. Remove any splash shields that are blocking your view, especially if there is fluid on them. If you find a fluid leak on a high point of the engine, you'll want to clean the area first and then check after the engine has been running for several minutes. Common places for leaks to occur are the oil pan, front as well as rear main seals, water pump, and the bottom of the valve cover.
If everything is visually good, move on to Step 3.
Step 3 – Clean engine
A clean engine will reveal its flaws.
Use an engine degreaser and water mix to clean any areas that are appearing dirty. You may need to use a scrub brush in areas with excessive dirt buildup. Once the engine is clean, start it and let it idle for several minutes. If the leak is very slow, you will want to add time accordingly. Now that the fluids path has not been disturbed, it'll be much easier to find.
If there are no apparent leaks, go to Step 4.
Step 4 – Check engine for leaks again
Now that the engine has been cleaned and given time, check again.
Perform an upper and lower visual inspection once again. Take note of any fluids leaking from the upper portion of the engine. As you move to the bottom side, use your flashlight to trace the leak around obstacles to its source.
If there are still no visible leaks, proceed to Step 5.
Step 5 – Use leak detection tools
Take it to the next level.
A simple way to detect leaks is by applying some Talcum powder to the leaking area. As the fluid drips past the powder, it will create a visible trail and point you to the leaking component.
UV dye can be added to just about every fluid system on your vehicle. Make sure the type of dye you're buying is compatible with the particular fluid you're adding it to. Once the fluid has been ran through the system for about twenty miles, inspect the leaking area with an ultra violet light. The leak will glow neon green.

Featured Video: How To Find Fluid Leaks in Vehicles
Related Discussions
- Radiator Leaking Coolant - CamryForums.com
- Camry Internal Oil Leak - CamryForums.com