Toyota Camry 1997-2001: Engine Performance Diagnostic Guide
If your Toyota Camry is having trouble climbing hills or is unable to idle smoothly, you probably have an issue with your engine. Here's how to diagnose your engine for performance problems.
This article applies to the Toyota Camry (1997-2001).
Engine performance problems come in a wide variety and can be caused by a long list of items. Some common problems are changes in engine idle, hesitation/poor acceleration, and misfires. When an engine performance problem occurs, determine if it's safe to continue driving your Toyota Camry before you begin diagnosis by performing some simple and routine checks. Most often an engine performance problem will only get worse over time, potentially leading to critical engine damage. If you maintain your vehicle and do not drive it at extreme levels, you have greater chances of avoiding these problems.
Materials Needed
- Scan tool (preferably with live data monitoring)
- Owner’s manual
- Basic tool set (ratchet, sockets, pliers, and screwdrivers)
- Vacuum gauge
- Propane
- Soapy water
- Fuel pressure tester
- Compression tester
Step 1 – Stay current with maintenance schedule
Staying up to date will insure the long life of the vehicle.
Often the source of your engine performance problem is related to maintenance items. These include the oil and its filter, air filter, spark plugs, coolant, serpentine belt and fuel filter. The service intervals for these items can be found in your owner's manual. Also, make sure your fluid levels are topped off, and then check them again after a week. If there is a noticeable change, the fluid is either being burned inside the engine or a leak is present.
If proper maintenance has been adhered to, continue to Step 2.
Step 2 – Check diagnostic trouble codes
A scanner can tell you exactly what is wrong with your vehicle.
Active diagnostic trouble codes will point you to an area of concern, saving you time and money. If you're experienced with scan tool data monitoring, sensor values can be watched and compared with freeze frame data. The ability to interpret these readings can be invaluable when faced with an intermittent engine performance problem.
An easy way to start is to learn the voltage levels that are expected at each sensor while changes are occurring. Some sensor voltage changes are:
- The throttle position sensor: This sensor ranges from close to 0 volts (closed throttle) to near 5 volts (open throttle), and should change quickly as the throttle is snapped.
- The coolant temperature sensor: This sensor also ranges from 0-5 volts, starting near 0 when the engine is cold and rising as the engine warms up.
- The manifold absolute pressure sensor: On this sensor, voltage will drop from close to 5 volts to near 0 volts as engine vacuum increases. A snap throttle test should show a large charge in the MAP sensor reading.

If the scanner doesn't show any faulty codes, then move ahead to Step 3.
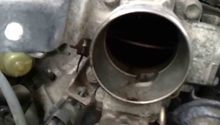
Step 3 – Perform visual inspection
The issue could be visible.
If you're familiar with your engine bay, checking vacuum lines and electrical connectors/wiring should not be difficult. Check for corrosion and tears in insulation. Start with the battery cables and work your way around the harness. Once you reach a connector, push/pull on it to make sure it's not loose.
Vacuum leaks can be tricky to find. Most high end shops use smoke machines for this purpose, but those can cost hundreds of dollars. Two cheaper methods are using propane and soapy water. First, spray propane along the intake and intake manifold. Then move to the vacuum lines that are running off the intake. If the engine RPM raises/responds to the propane, there is a leak in the system. Soapy water sprayed onto vacuum lines with leaks will form bubbles at the leak.
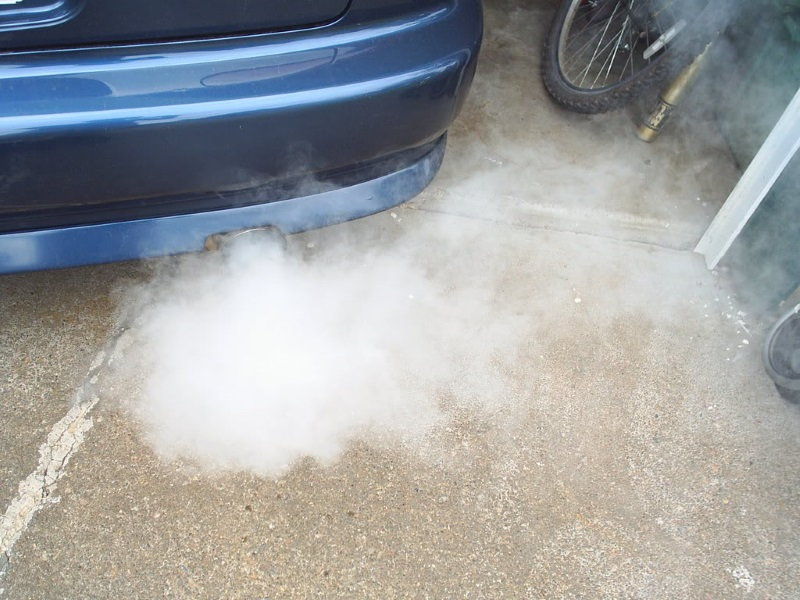
Using your senses is one of the most effective ways to locate an engine performance problem. If you can smell, see or hear something unusual, chances are you will find it. Move back to the exhaust pipe and watch the color of the exhaust. Also note the odor. If the exhaust is black, blue, or white in color, your engine's combustion is not correctly taking place. Exhaust that smells of raw fuel indicates a rich condition.
Moving back to the engine bay, vary the engine RPM by moving the throttle body linkage. Listen for unusual squeaks and rattles. These are commonly associated with drive belts and pulleys. If you see the engine shaking, you can be certain a misfire is occurring or the engine mounts are damaged.
If everything looks good, proceed to Step 4.
Step 4 – Continue troubleshooting
The problem can't hide for much longer.
Now that you've verified that common problems are not present, it's time to begin a more advanced troubleshooting to track down the problem.
One of the most commonly used tools is a vacuum gauge. A vacuum gauge is used often because it shows how much air is entering the engine, and the results are conclusive. Hook a vacuum gauge to the intake or the intake manifold port. You can also "T" the gauge into a vacuum line. Record the vacuum readings at idle (3,000 RPM) and snap the throttle. Normal readings are 17-21 inches of Hg. at idle. The idle readings should be about equal at 3,000 RPM. Snap throttle readings should drop close to 5, and then rebound near idle readings.
Some common problems and its associated vacuum gauge readings are:
- At idle, a needle that drops 3-5 inches Hg and returns to normal indicates sticking valves.
- At 3,000 RPM, a needle that fluctuates rapidly indicates weak valve springs.
- At idle, if the vacuum reading is low (8-14 in./Hg.), the engine may have incorrect valve timing.
- Performing a snap throttle test: if the needle slowly drops and then returns to normal, there may be an exhaust restriction.
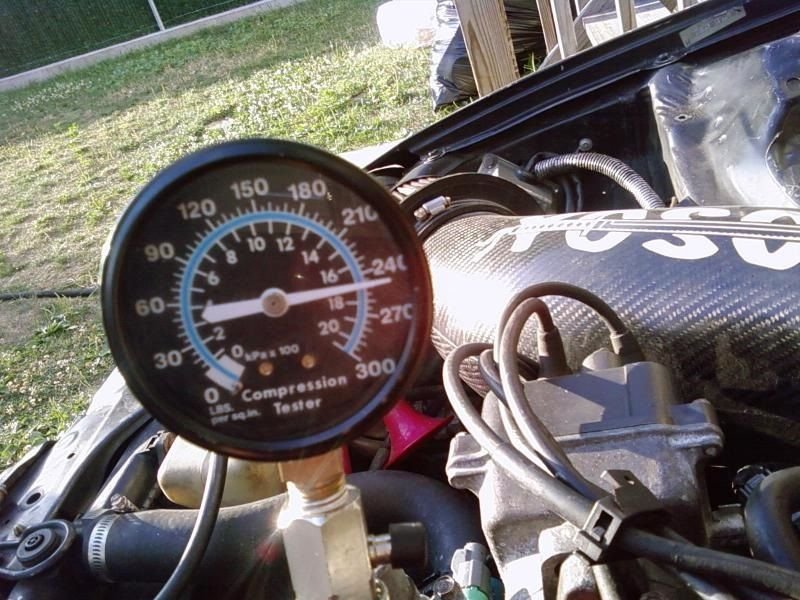
Your next steps to locate the problem are to perform more measurements and compare the results to the manufacturer's specifications. For example, a compression test on the 2.2 liter 5SFE engine should result in readings of 175 or higher PSI on all cylinders.
Fuel pressure and volume can also be checked to verify the fuel pump is operating properly. With the key in the "off" position, fuel pressure should be between 44-50 PSI. A volume test is performed by opening the drain found on some fuel pressure testers, and measuring the amount of fuel that enters a pint sized container for fifteen seconds. The pump should deliver about 1/2 a quart of fuel every 30 seconds. Fuel volume is important because the pressure can appear normal at idle, but volume may still be too low while driving due to the increased fuel demand from the engine.
Featured Video: How to Use Vacuum Gauge to Diagnose Engine Problems
Related Discussions
- Camry Hesitates When Gas is Applied - CamryForums.com
- Camry Starts Shaking When Put into Gear - CamryForums.com