Toyota Camry 1997-2001: How to Replace Timing Belt and Water Pump
The timing belt is made of a hard rubber compound. It is susceptible to stretching and tearing as it rotates very quickly between the engine pulleys. Replacing the belt is difficult, but the job is much easier if no engine damage has occurred.
This article applies to the 4th generation Toyota Camry (1997-2001).
The timing belt connects the crankshaft, camshaft, water pump and oil pump together. Once this belt breaks, all engine power is lost. A timing belt can be checked visually by removing the timing belt covers; although, belts that appear unworn by eye may still break. Engine damage can result when the belt breaks on an interference engine. Interference refers to the contact that can be made when the pistons strike the valves on a incorrectly timed engine. The VVT-i version of these engines have an interference design. If your belt broke on your VVT-i engine, you may want to perform a leak down test to confirm your valves/pistons are not damaged.
The Toyota Camrys come equipped with a 4-cylinder (5SFE) or 6-cylinder (1MZFE) engine. Each engine's recommended timing belt replacement interval is 90,000 miles. When replacing the timing belt, it's advised to buy a timing belt kit. Kits will include a timing belt, water pump, and idler pulleys.

Materials Needed
- Socket set (8mm-21mm)
- 3/8" and 1/2" ratchets
- Variety extension lengths
- Pry bar
- Impact wrench
- Stud removal tool (V6 engine)
- 2 wheel chocks
- Floor jack
- 2 jack stands
- Breaker bar
- Flat head screwdriver
- Block of wood
- Gasket scraper
- Drain pan
- Shop rags
- Brake cleaner
- 2 gallons of coolant
- 1 timing belt kit with water pump
The 4-cylinder and 6-cylinder engine timing belt replacement procedures differ slightly. Some things to note on the 1MZFE engine are:
- A 10mm stud holds the water pump to the block on this engine. A stud removal tool can be used, otherwise the camshaft sprockets and timing belt cover will need to be removed first.
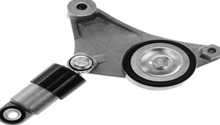
- The tensioner will apply tension to the belt as the tesnioner bolts are tightened. There is no separate tensioning spring.
Use Figures 1 and 2 to familiarize yourself with the timing system components on the 5SFE engine.
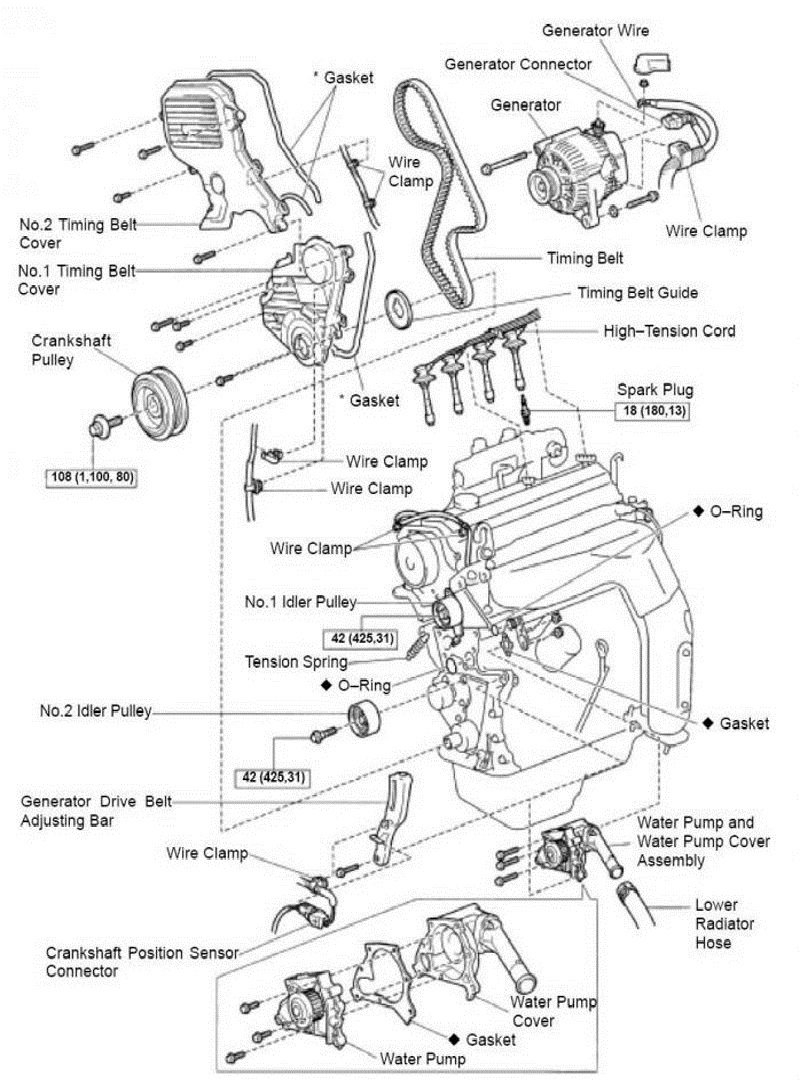
Figure 1. The timing belt diagram. 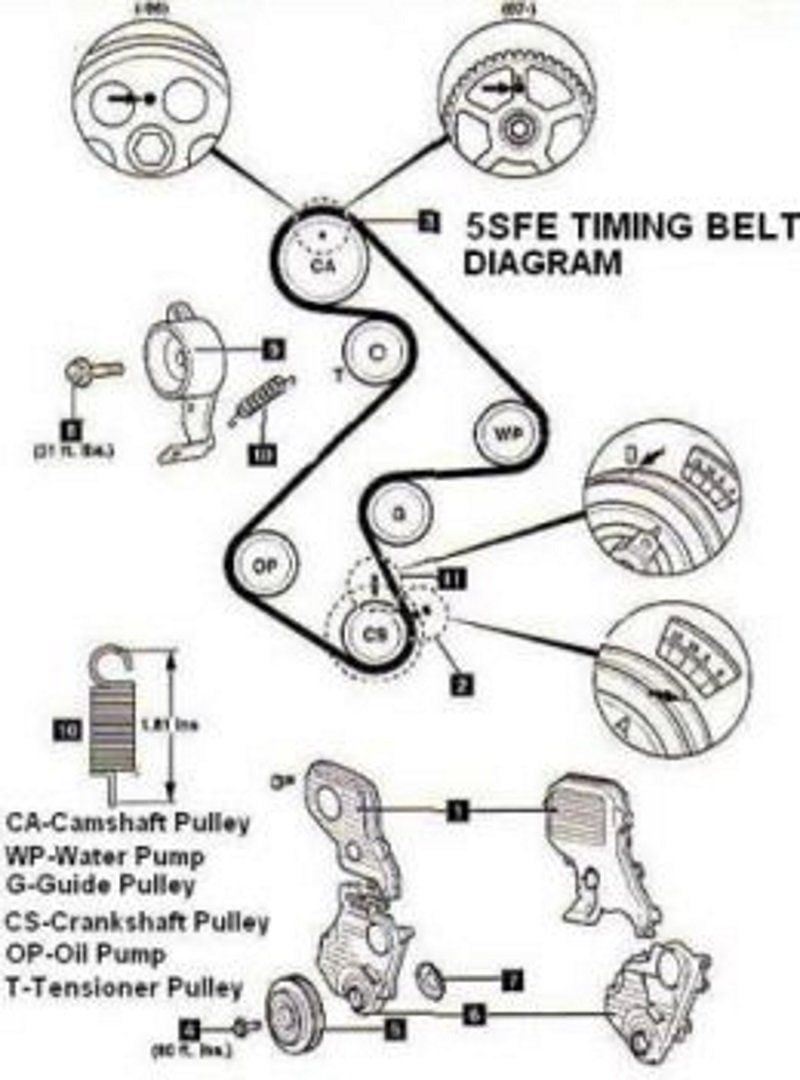
Figure 2. The timing belt components and alignment marks on the 5FSE engine.
Step 1 – Raise the front of the vehicle
Engage the parking brake and chock the rear wheels. If you do not have an impact wrench, loosen the lug nuts on the passenger's side front wheel, but do not remove them. Using your floor jack, raise each front wheel and place jack stands under the frame rails. A block of wood can be used to reduce the risk of damage caused by the jack stands.
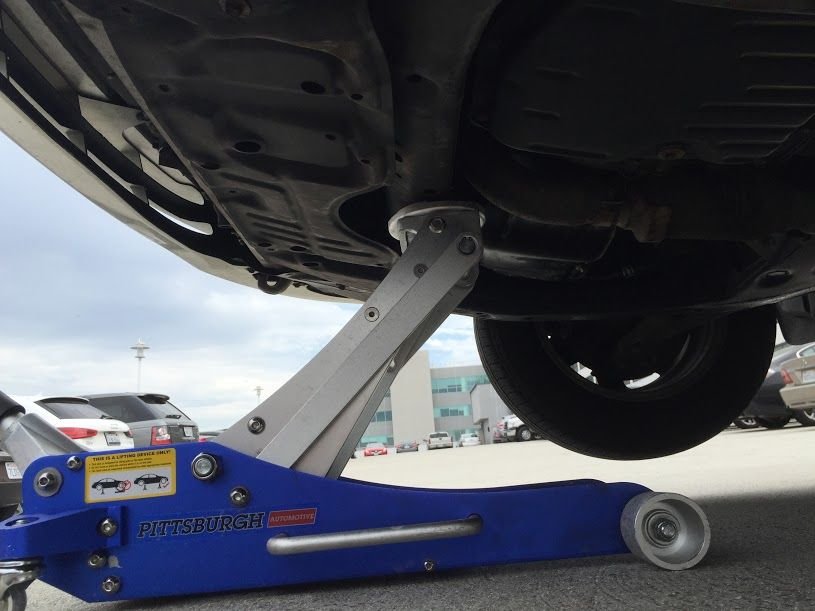
Figure 3. Jack up the front end via the front crossmember. 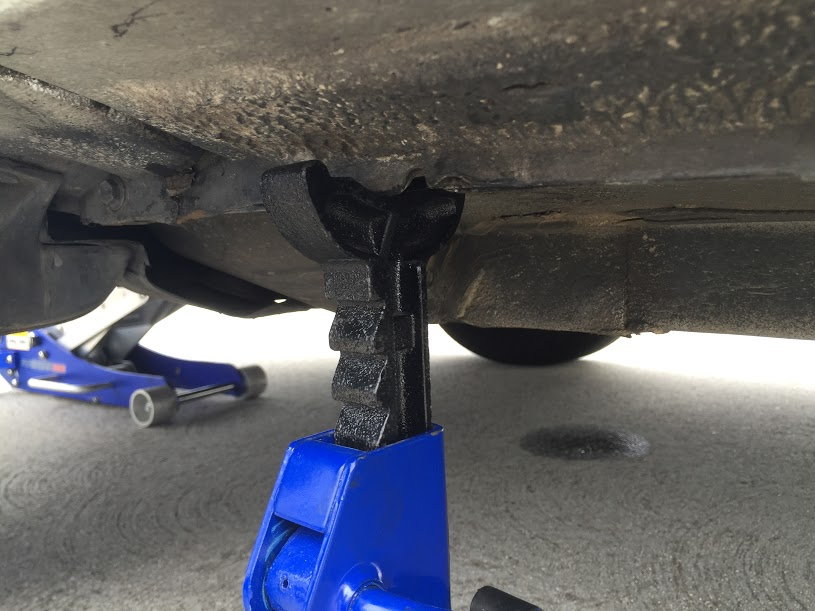
Figure 4. Secure on stands via pinchweld.
(Related Article: How to Jack Up Your Car - CamryForums.com)
Step 2 – Remove passenger's side front fender apron seal
Behind the passenger's side wheel is the apron seal. Two 10mm bolts hold it in place. Removal will give you access to the harmonic balancer and timing cover.
Step 3 – Drain the coolant
Place a drain pan underneath the radiator and loosen the radiator drain plug.
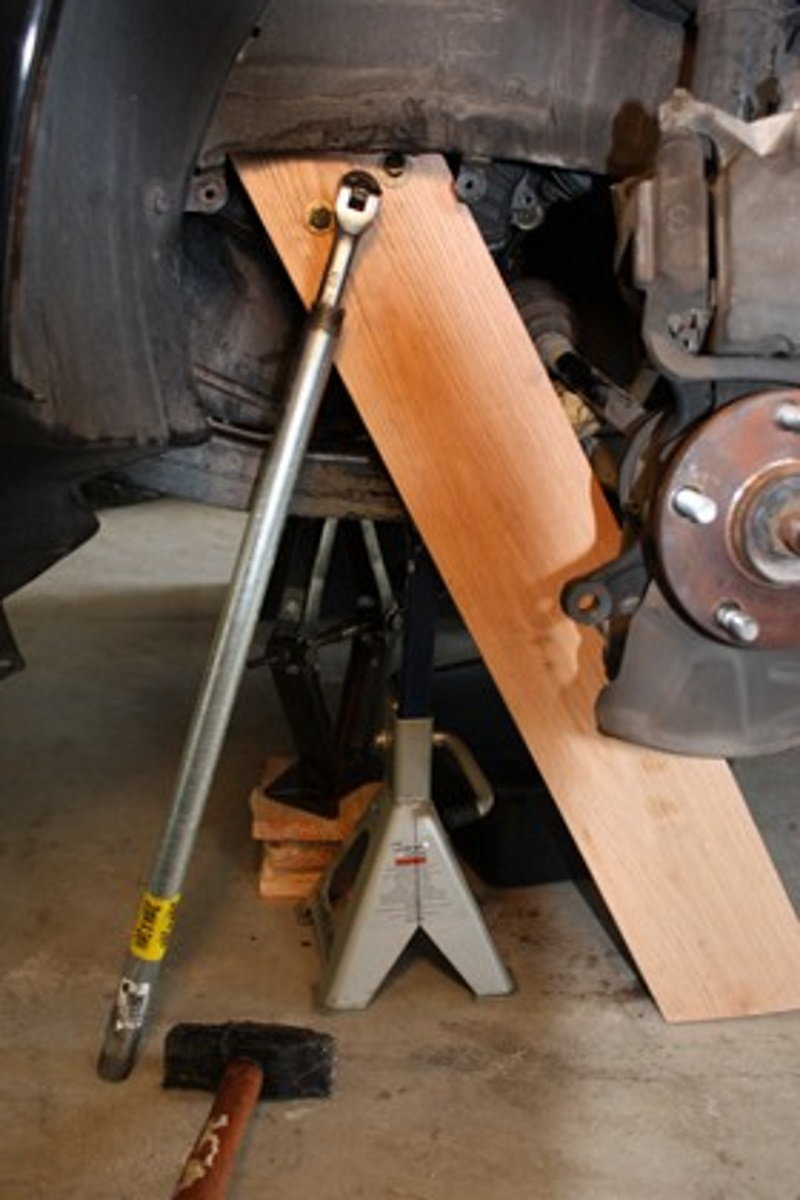
Step 4 – Loosen the crankshaft pulley bolt
Use your impact driver to remove the bolt. If you do not have an impact driver, a breaker bar can be placed against the ground or vehicle frame. The engine will spin clockwise, so be sure you place the breaker bar in a location where it will not move and damage the car. With the breaker bar locked in place, turn the ignition to the start position for one second. This should make the bolt loose enough for removal with a ratchet.
Once the bolt is able to rotate, use it to move the harmonic balancer back into top dead center alignment with the timing belt cover. A quick counterclockwise twist with the ratchet should not disturb the pulley's alignment and make it possible to fully remove the bolt.
Step 5 – Remove the power steering belt
Loosen the power steering adjustment bolt with a 12mm socket. Using a long pry bar, lift the power steering pump in an upward direction to remove the belt.

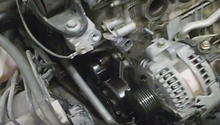
Step 6 – Remove the alternator belt and bracket
Disconnect the three ground straps found on top of the timing cover. You will need to squeeze the flexible tabs on the connectors to separate them. Loosen the alternator adjustment locking bolt and pivot bolt until the alternator can be moved far enough for belt removal. Remove the alternator bracket bolt and bracket, then remove the camshaft position sensor wire clamp. Separate the connectors by squeezing and pulling them apart. Figure 1 has views of both of alternator bracket and camshaft position sensor wire clamp.

Step 7 – Remove the engine control rod and mounting bracket
Support the engine by placing a wooden block on your floor jack and pushing against the oil pan. It does not have to be raised much, but just enough to remove the engine's weight from the motor mount. Remove the three bolts from the engine control rod, and then the three bolts from the engine mounting bracket. The bracket is shaped like a triangle and bolts can be found at each corner.
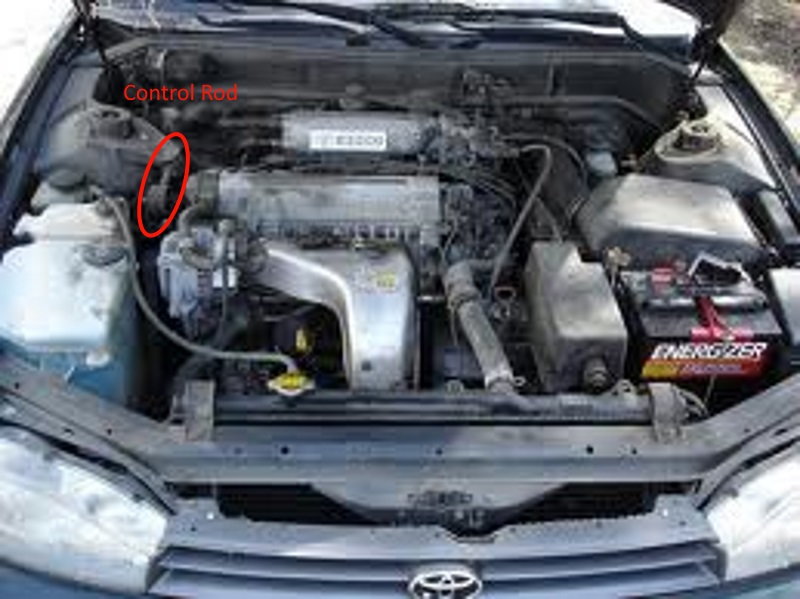
Figure 8. The control rod's location. 
Figure 9. The red arrow points to the lower bolt on the engine mounting bracket.
Step 8 – Remove the timing belt covers and harmonic balancer
Remove the four 10mm bolts surrounding the upper timing belt cover, and then remove the harmonic balancer. If the balancer will not pull off the crankshaft snout, two flat bars can be used as leverage. If you're still unable to remove the balancer, you'll need a bolt-type balancer pulling tool.
Now remove the lower timing cover and disconnect the crankshaft position sensor.
Step 9 – Remove the timing belt
With the timing gear sprocket and camshaft gear still at top dead center, apply paint marks to the belt, gears, and backing plates to ease new belt alignment. The old belt can be laid against the new belt to transfer the marks. This makes an easy to see guide while tensioning the new belt.
Remove the tension spring and idler pulley from the tensioner, then remove the belt.
Featured Video: How to Remove Timing Belt
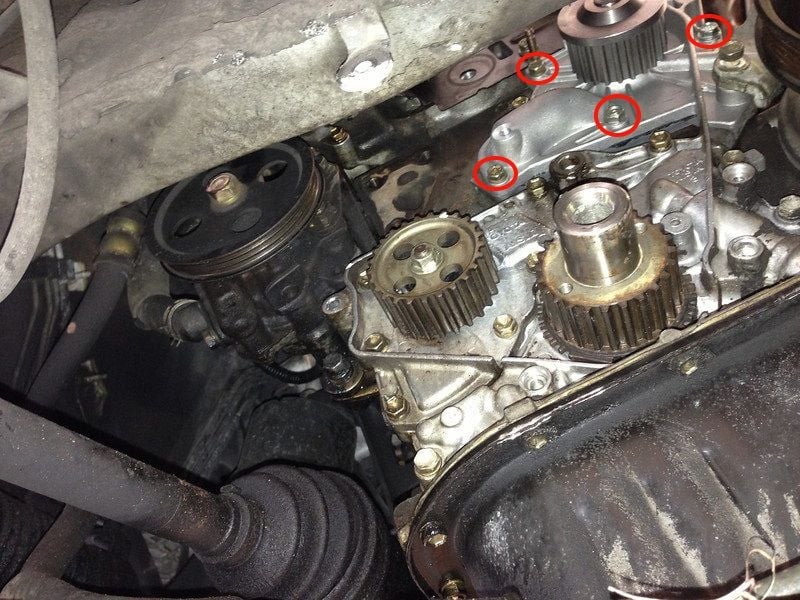
Step 10 – Remove the water pump
Seven bolts hold the water pump to the block. Move your hand around the edge of the pump to find them. Once the bolts are loosened, have a drain pan ready because some coolant will still be in the pump. Once the pump is removed, clean the block mounting surface with a gasket scraping tool. Rub the surface clean with brake cleaner and a rag.
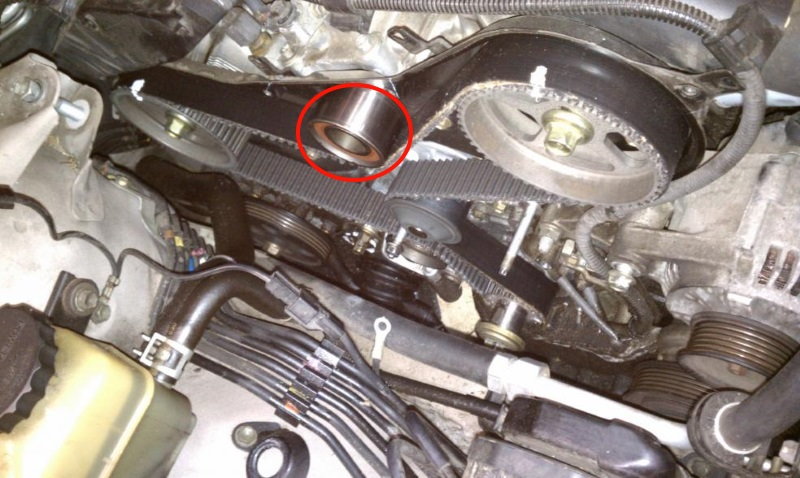
Step 11 – Install the new timing belt
Install the new idler pulleys. Position the tensioner idler pulley close to the camshaft to keep tension off of the new belt during installation. The tensioner idler pulley only needs to be hand-tightened.
Begin routing the timing belt in this order: crankshaft gear, idler pulley, water pump, then camshaft gear. Once the belt is routed around the camshaft gear, an alligator clip can be used to keep tension on the belt between the camshaft and crankshaft. Finish installing the belt onto the remaining pulleys. The painted alignment marks should match up with the gears.
Attach the idler pulley tensioner spring. Install the crankshaft bolt into the crankshaft gear and turn the engine clockwise two full rotations. Check the pulleys to make sure the belt is correctly aligned with the timing marks. The belt should be centered on the pulleys. If all is well, tighten the tesioner idler pulley.
Step 12 – Finish the installation
Reverse the removal procedure for installation. The harmonic balancer bolts needs to be torqued to about 100 ft.-lbs. Reassemble all of the timing covers and double check that the motor is timed correctly. Re-install the passenger's side engine mount, and redo all of the disassembled accessories on the side of the motor, including your alternator. Before you start the car, make sure you have filled the cooling system. Leave the cap off the cooling system to bleed all air from the system as the engine is warming. Let the car idle and listen for any unusual noises. If everything checks out, lower the car off the stands and go for a test drive.
Featured Video: Timing Belt/Water Pump Replacement
Related Discussions
- Camry Timing Belt Marks - CamryForums.com
- Timing Belt Replacement - V6 - CamryForums.com
- Timing Belt Replacement DIY - CamryForums.com