Toyota Camry 2002-2006: How to Replace Door Latch Assembly
Certain components get more wear and tear than others, and your door latch is one of them. Here is how to fix it.
This article applies to the 5th Generation Toyota Camry (2002-2006).
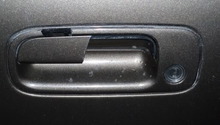
Most of the time we don't stop to think about how many moving parts there are inside of a car, which we rely on day in and day out. Well, your Camry's door latch happens to be one of those components. Not only is the plastic latch important, but so is the cable and release mechanism that operate behind the door panel, ultimately enabling you to do something as simple as opening and closing your car's door. So because a faulty door latch is not only annoying and potentially dangers, read on to resolve the issue.

Materials Needed
- New door latch assembly
- Phillips screwdriver
- Ratchet with 10mm socket
- Trim removal tool
- T30 Torx screwdriver
Step 1 – Remove the door panel
Once you've identify which door latch is not functioning, you must first prep a few items before the door panel can come off. In this DIY guide we will be focusing on the driver's side door.
- Start by using a Phillips screwdriver to remove the screw inside the door armrest cubby.
- Then pop out the plastic tray out, and disconnect the power window switches.
- Remove another Phillips screw located right by the side mirror, and an additional three screws located at the very bottom of the door panel.
- Gently pull the door panel off, and use the trim removal tool to release any plastic screws attached to it.

Figure 1. Remove screw in the armrest cubby. 
Figure 2. Disconnect the power window connectors. 
Figure 3. Pull the door panel off.
Step 2 – Remove the old door latch
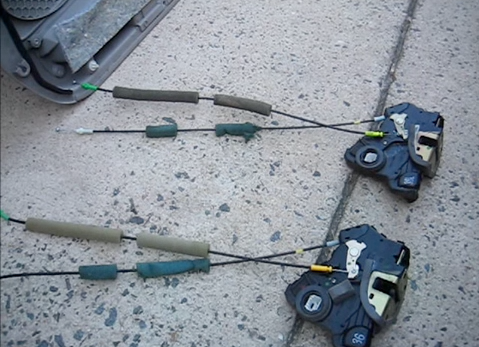
Now that the door panel has been removed, you can begin to remove the old door latch assembly.
- Begin by disengaging the two cable pulls behind the inside door handle.
- Then remove the three T30 Torx screws located on the side of the door.
- Use a ratchet with 10mm socket to remove the bolt located on the bottom-left corner of the door frame.
- Lastly, reach in through the large door frame opening nearest to the door latch, and pull out the entire door latch assembly.

Figure 4. Remove the cable pulls. 
Figure 5. Remove the three Torx screws. 
Figure 6. Remove the bottom door frame bolt.
Step 3 – Install new door latch and re-install
- Wiggle the new door latch assembly into the same place as the one you removed.
- Secure the door latch with the three T30 Torx screws, so it's easier to hold it in place.
- Then re-install the 10mm bolt.
After the new door latch has been installed, complete the job in reverse order to the steps above.
- Install the door latch's cable pulls.
- Re-install the door panel.
- Connect the power window switches.
- Re-install the screws on bottom of the door frame, the side mirror, and inside door armrest cubby.
Featured Video: How to Replace Door Latch
Related Discussions
- Broken Door Won't Open How to Remove Panel Without Opening the Door - CamryForums.com
- Need Door Help '98 Camry - CamryForums.com
- Changing Door Handle '97 to '01 - CamryForums.com