Toyota Camry: How to Replace Timing Belt and Water Pump
Save yourself a bundle by doing some general maintenance on your Camry's engine yourself.
This article applies to the Toyota Camry (1997-2011).
Many Camry owners dread the 60,000 mile marker because of the costly timing belt and water pump recommended maintenance interval. The last thing you want to do is to strand yourself because of a broken timing belt or busted water pump. Being stranded is the least of your worries at this point. Driving in either one of these conditions can lead to serious engine damage and a major repair expense. While this job is not for the squeamish, you can complete this task on your own with a standard set of tools, time and patience. The use of special tools makes this job doable, but still not the easiest DIY in the world. You will be overjoyed with the money you kept in your wallet and a real sense of accomplishment when this DIY job is finished.

Materials Needed
- 3/8 or 1/2 inch ratchet and metric socket set
- Metric open and boxed wrenches
- Hydraulic floor jack
- Jack stands
- Catch pan for fluids
- Torque wrench
- Shop rags
- Special tools such as pulley kit, stud removal tool and cam shaft adjuster tool
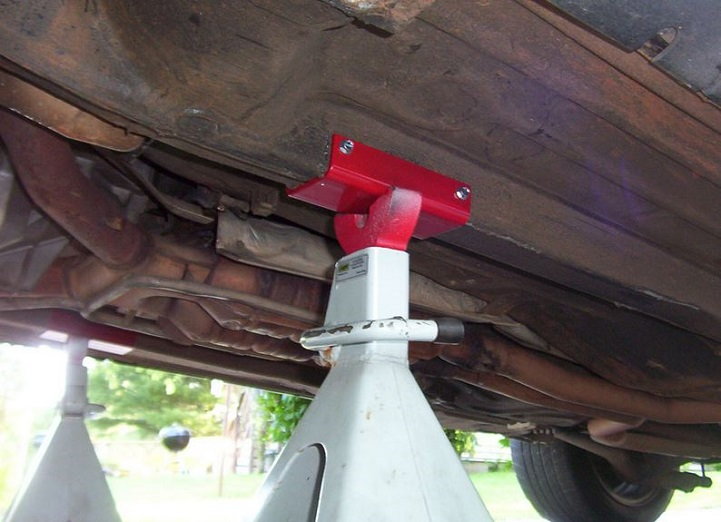
Step 1 – Jack up front end
Use your hydraulic floor jack to raise up the front end and place on jack stands. Be sure to use the correct locations for lifting and placement of the jack stands. Never work under your vehicle using only a floor jack for support; always use the jack stands and chock the rear wheels, both in front and behind them, unless you are lifting the entire vehicle and using all found jack stands.
(Related Article: How to Jack Up Your Car - Camryforums.com)
Step 2 – Disconnect the battery
Lift the hood and disconnect the negative battery terminal. Whenever you are working in the engine compartment, and especially around the fan, always disconnect the battery first.
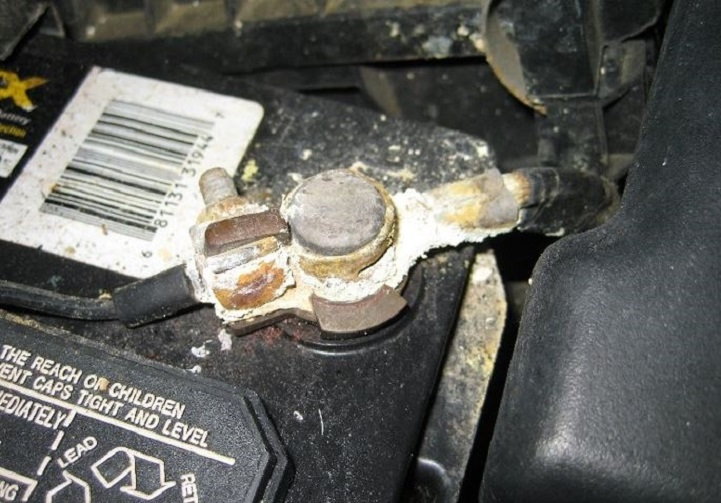
Pro Tip
Now is a good time to clean your battery terminal connections if they have some corrosion present.
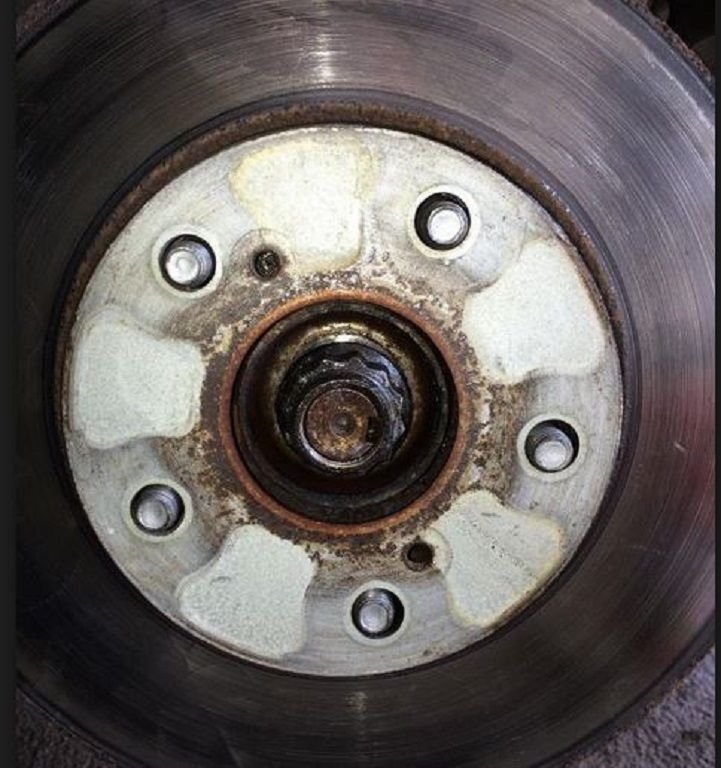
Step 3 – Remove passenger tire
Create some extra room to work by removing the passenger tire. It is easier if you break the lugs before lifting the car and then remove them after the car is in the air.
Step 4 – Drain engine coolant
Remove the drain plug from the bottom of the radiator on the passenger side. Replace the plug when finished. You will also want to drain it from the engine block as well by removing the two drain plugs on the bottom front and rear of the engine. The rear is a little more difficult to get to. Replace the plugs and be careful not to over-tighten when you screw them back into place. Any oil change shop will take your used fluid to dispose of it properly.
An optional step here is to remove the coolant reservoir tank. Remove the clip that holds the hose in place, and then there's a single bolt that attaches it to the fender. Removing this tank gives you more room to work and it is a good time to wash out the inside of this tank.

Pro Tip
Radiator fluid is slippery and toxic to animals. Clean up any spills immediately.
Step 5 – Remove torque strut
Remove the torque strut, also known as the dog bone (nicknamed due to the shape and size).
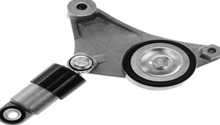
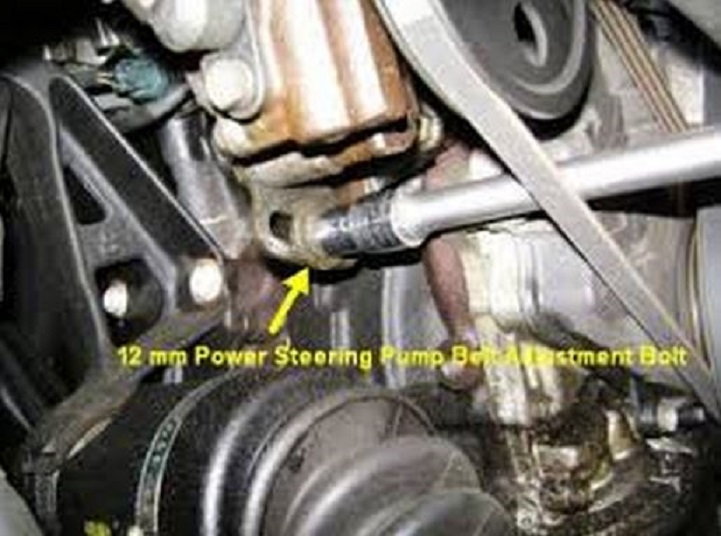
Step 6 – Remove A/C and P/S belts
Behind the passenger wheel is an access panel that is held in place by two 10 mm bolts. Remove the bolts to get access to the air conditioning and power steering belts. Use a wrench to put onto the tensioner pulley (12 mm bolt) to create slack in the belts and remove each belt. Inspect them for cracking or wear and replace with new ones while you have them off.
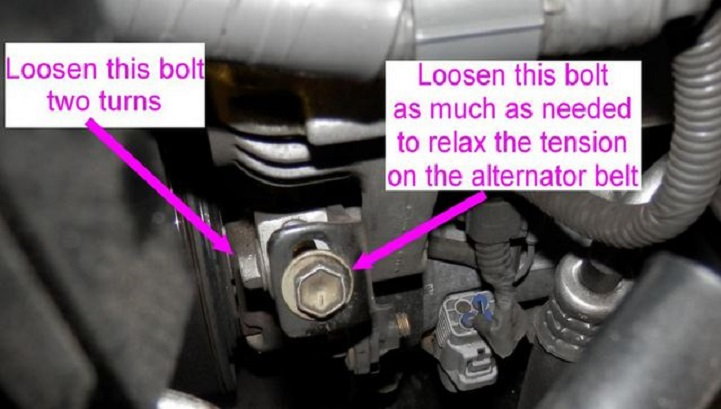
Step 7 – Remove alternator belt
Removing the alternator belt is a bit involved. You will have to move the bracket that holds the alternator in position out of the way first, but you will not have to completely remove the bracket which will help in keeping all these bolts organized.
- On the right side of the bracket is a bolt that is used to pivot the bracket for positioning. Just loosen this bolt, but do not remove it completely.
- Remove the nut positioned to the left and down a little from the pivot bolt. Once the nut is removed, the mounting bracket can be swung up and out of the way.
- Two bolts are used to adjust the tension on the belt. They are at 90 degrees in relation to one another. They both need to be loosened, but do not need to be removed.
- The tensioner bolt on the left hand side is difficult to get to. An optional step is to remove the fuse box assembly. This is held in place by two 10 mm bolts in the bracket. These can be removed; pull the bracket and the fuse box can be pulled up and out of the way.
- Loosen the adjustment bolts just enough to move the tensioner and create slack to remove the alternator belt.
Step 8 – Remove crank shaft bolt
The bolt on the crank shaft pulley is as tight as anything you'll come across on this vehicle. It is a real bear to remove. If you have an impact wrench, it is fairly simple. If you do not, it is extremely difficult. There is a method to doing this that makes it a little easier, but you have to be very careful.
- Put a long-handled wrench or breaker back onto the bolt and secure it to something solid that will not move such as the garage floor or part of the frame of the vehicle and make sure it is wedged securely.
- Reconnect the negative battery terminal.
- Get in the car, put on the emergency brake.
- Step on the break pedal as far as it will go.
- Turn the ignition to the on position without turning the engine over. You just want to engage the starter without actually starting the car. Once you hear the starter click, turn it back off and remove the key.
- Check the crank shaft bolt; it should be loosened now, but if not, repeat the process until it is.

Step 9 – Remove crank shaft pulley
If you are extremely lucky, the pulley will come off by hand once you remove the two smaller bolts that hold it in place. This is likely not going to be that easy. You will want to use a pulley removal kit that can be had pretty cheaply. Make sure you use one like in the figure below. Other types of pulleys use metal grippers that can damage the teeth of the pulley. A new pulley will cost you $200-300, so be very careful when removing it.

Step 10 – Remove timing belt covers
- Remove the four 10 mm bolts holding the lower timing cover in place. Set this aside.
- Remove the timing belt guide. Make sure to mark its orientation to the engine block to put it back in place the correct way.
- Loosen the 10 mm timing belt plate bolt, but don't remove it. Turn the plate about 90 degrees and re-tighten the bolt so you won't misplace it.
- Remove the five 10 mm bolts holding the upper timing belt cover in place and set this aside.
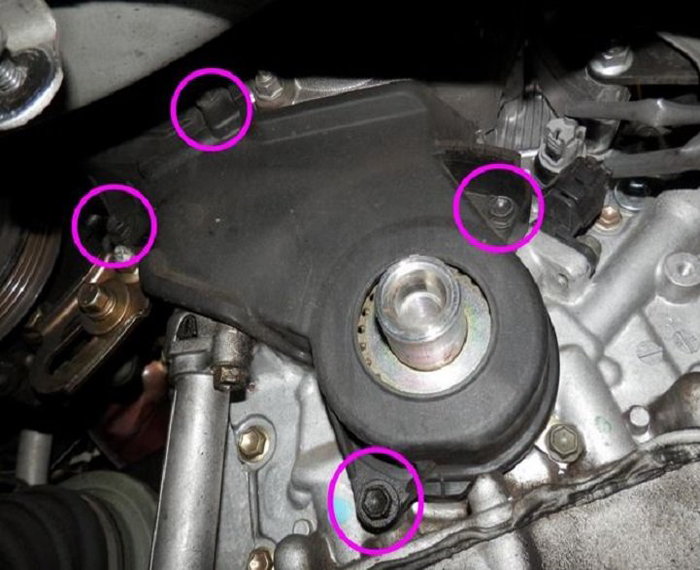
Figure 10. Remove the four 10 mm bolts on the timing cover. 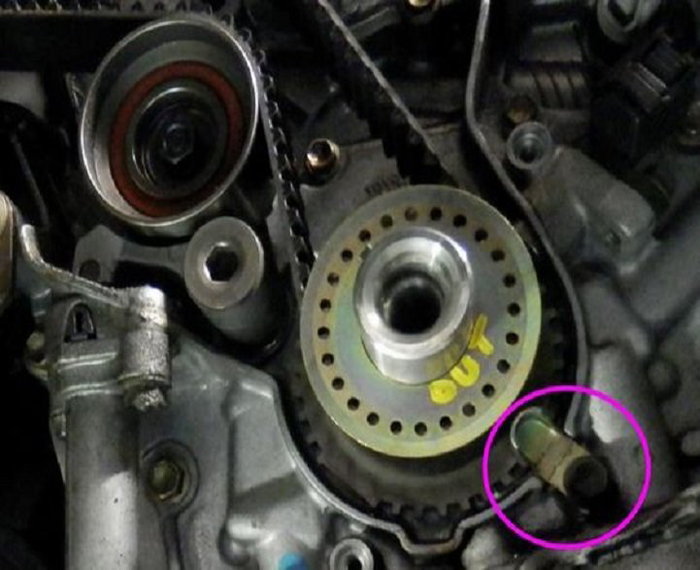
Figure 11. Remove the timing belt guide, but mark its orientation before removing to make reassembly much easier.
Pro Tip
The rear most bolt on the upper timing belt cover near the firewall is blocked by a power steering fluid hose. The easiest way around this is to lift up the entire power steering reservoir from the fender to make room to get to the bolt.
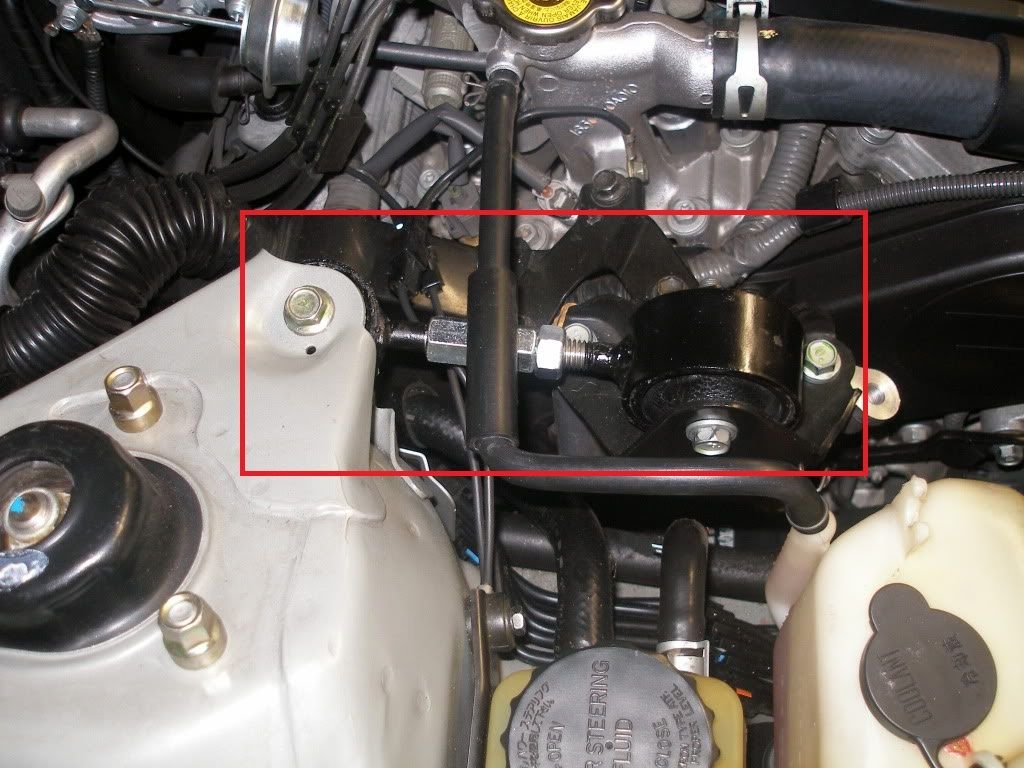
Step 11 – Remove RH engine mounting bracket
This step is easily the most painful and difficult to work, unless you purchase a special stud pulling kit, about $40. It is a good investment even if you only use them for this process. They look like spark plug sockets and make this job much easier. There are alternative methods; however, one of which will destroy the existing studs and you will have had to pre-purchase new ones from a dealership before starting the project and the other way has some strong implications of destroying your oil pan. The steps outlined below will use the purchased kit.
- Remove the two bolts and nuts that hold the bracket in place.
- Place the correct stud puller socket onto the stud and remove it.

Figure 12. Use a stud puller kit to remove the engine studs. 
Figure 13. Use a puller to remove the engine studs.
Step 12 – Remove the timing belt
Before you remove the timing belt, you will have to line up the crank and camshaft positions to TDC or the 12:00 position. Replace the crankshaft bolt without the pulley and crank it until the marks like up to the TDC position. They are difficult to see at first, but they are marked. You may want to use something to make the marks more noticeable and mark their position on them. You will line the new belt up with both of these marks. If you don't get this right, you won't be able to start the car.
Once the marks are lined up, remove the two timing belt tensioner bolts; remove the tensioner and the belt.
Step 13 – Remove cam shaft sprockets and inner timing belt cover
The use of another special tool makes this job much easier. Other methods can be used, but again, you risk damage to the teeth of the sprockets if you try to do it that way. This step uses the special tool which is fairly cheap and good insurance.
- Put the cam adjuster tool onto the sprocket bolts and remove.
- Remove the wiring harness quick connect clips from the timing cover. There are four places where it attaches as such. A small flat head screwdriver works well to disconnect these clips. Set the wiring harness up and out of the way.
- Remove the upper idler bolt.
- Remove the lower idler bolt which is a 10mm Allen bolt.
- Remove the six 10mm inner timing cover bolts and remove the inner timing belt cover.

Figure 15. Use a cam adjuster tool to remove the cam sprockets. 
Figure 16. Remove the inner timing cover.
Step 14 – Remove water pump
There are four bolts and two nuts holding the water pump in place. Remove these and make sure to keep the location of each nut and bolt in correct orientation when you add the new water pump.
Step 15 – Replace water pump, timing belt and button her back up
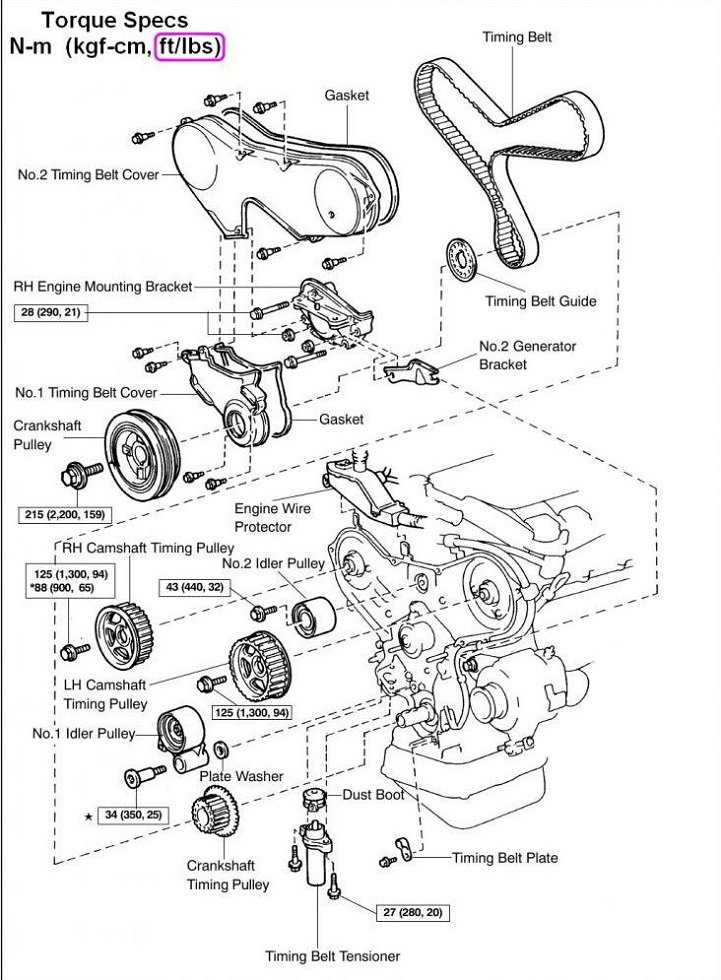
Before you replace the water pump, be sure to clean the surface where the new gasket will go. The aluminum can scratch and gouge easily, so use a plastic putty knife to scrape away any of the old gasket residue. Slip the new gasket in place and then replace the water pump. Follow these directions in reverse order to replace the sprockets, belts and pulleys. Be sure to follow the correct torque specifications, especially for the crank shaft pulley which is seriously tight. Replace your engine coolant with manufacturer's specifications. If you are not using a pre-mixed solution, make sure that you dilute the coolant 50:50 using only distilled water.
Featured Video: Camry Timing Belt/Water Pump Replacement
Related Discussion and Video
- Camry 5SFE Timing Belt, Water Pump, Oil Seal Replacement - Camryforums.com
- Timing Belt and Water Pump Replacement - Youtube.com