Toyota Camry 1997-2001: How to Replace Alternator
If the alternator is bad in your Toyota Camry, your battery will keep draining itself since nothing is there to charge it. Learn how to replace your alternator to save your battery and save your money.
This article applies to the 4th generation Toyota Camry (1997-2001).
The alternator is the most important part of a Toyota Camry's electrical system. It charges the battery and provides power to the ignition system, as well as operating all of your electrical peripherals like the radio and windows. So it's very important that this piece of equipment is running at peak performance. You don't want your alternator to fail at the wrong time and leave you stranded.

Materials Needed
- Socket wrench
- 10, 12 and 14mm sockets
- Hammer
- Towel
- Screwdriver (optional)
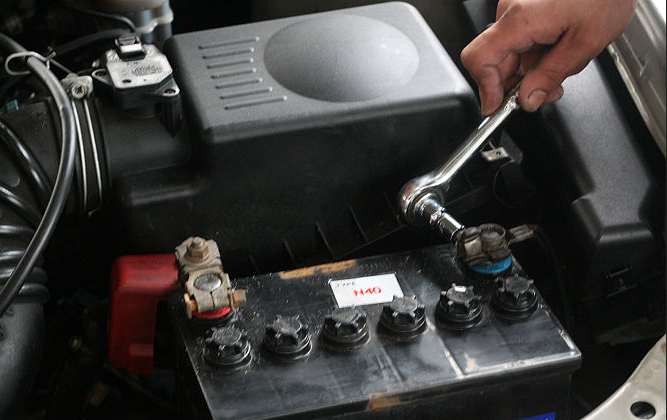
Step 1 – Disconnect negative battery terminal
Using the 10mm socket and socket wrench, remove the negative (black) battery cable. Make sure you set the cable somewhere that it cannot come in contact with the battery. You can push it down next to the battery to a position that will hold it in place. It's recommended you wrap it in a towel to avoid contact with any metal objects in the car.
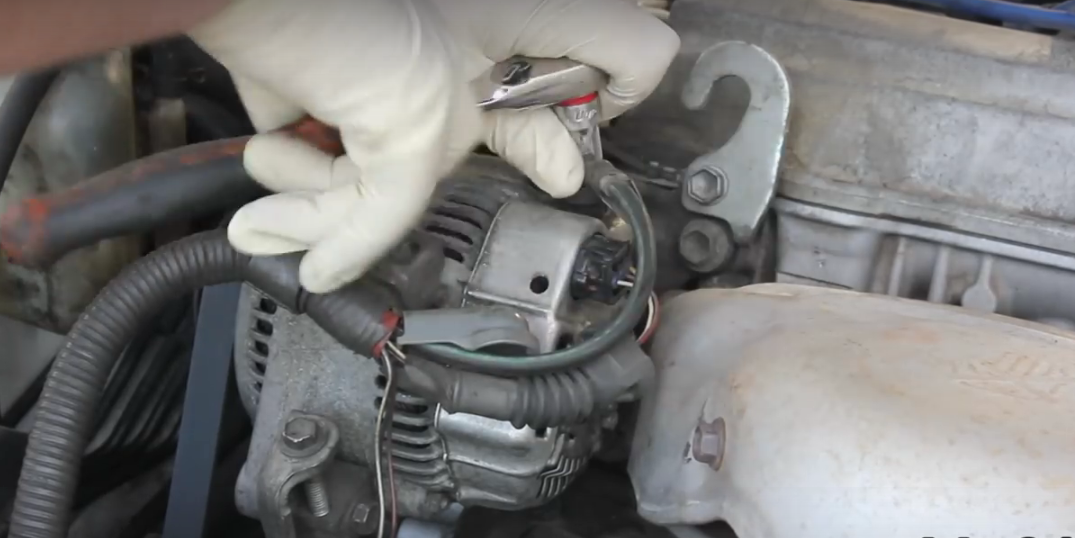
Step 2 – Disconnect alternator wires
Locate the alternator, which will be in the front, on the upper left-hand side of the engine as you face the car. Remove the plastic cover from the cable terminal on the alternator. Using your 10mm socket wrench, remove the nut from the terminal. Next, remove the wire harness connection by pinching and squeezing the release located on the harness connector. Now, remove the cable and harness from the alternator mount by pushing in the mounting clip and pulling the wires free.
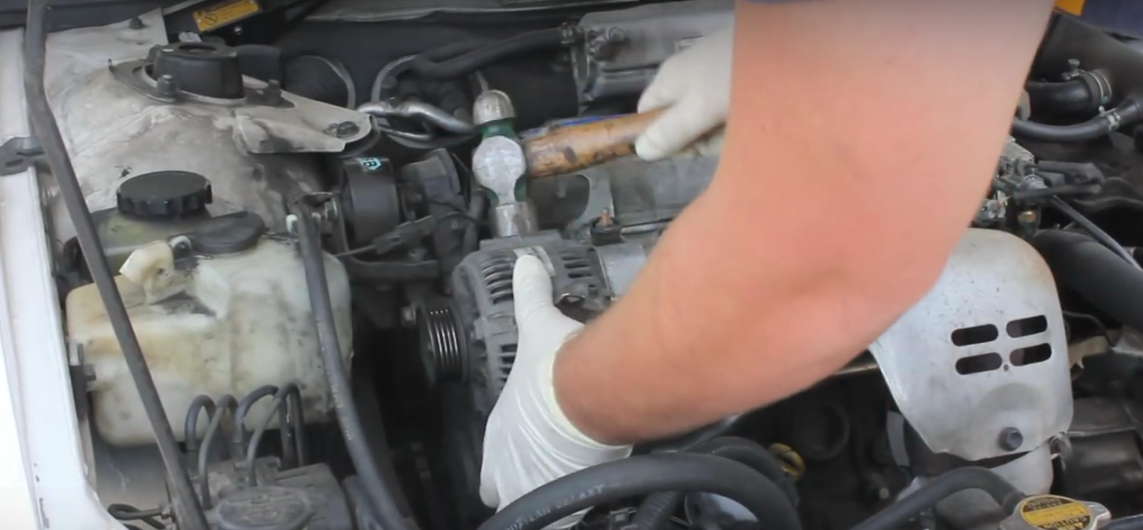
Step 3 – Pull out alternator
Loosen the two mounting screws by using the 12 and the 14mm sockets. Then, loosen and back out the tension screw to allow enough slack in the belt to pull it off of the alternator pulley. Next, remove the two fasteners you loosened earlier. Now, pull the alternator out by rocking it back and forth until it comes off completely.

Pro Tip
If rocking the alternator does not free it, you may need to use a screwdriver to pry it off of the top mounting bracket.
Step 4 – Mount new alternator
Take the new alternator and insert it into the top mounting bracket. You will need to use your hammer in order to tap it into place. Line up the mounting holes by rocking the alternator back and forth. Now, insert the fastener to hold the alternator in place. Next, insert the lower bolt. Do not tighten the bolts. Now place the belt over the alternator pulley. Go ahead and tighten the tension bolt until the fan belt gets tight. Tighten down the mounting hardware.
Step 5 – Reattach all wires and cables
Clip the wiring harness into place. Replace the cable and tighten down using the 10mm socket. Put all caps back into place. Now attach the negative (black) ground cable to the battery terminal.
Featured Video: How to Replace Toyota Camry Alternator
Related Discussion
- How to Replace Camry Alternator - CamryForums.com