Toyota Camry 1997-2001: How to Replace Fuel Pump
If your car's engine is turning over but won't seem to fire up, it might just be the fuel pump. Here's how to replace yours so you can make fire again.
This article applies to the Toyota Camry (1997-2001).
There might come a time when you go to get in your car to drive away, you put the key in the ignition, turn it, and the starter is cranking away but the engine just won't fire up. The most frustrating thing is that there were probably signs that you could have noticed, showing you that your fuel pump was about to go out. If you noticed them, then you could have probably taken care of it immediately and avoided sitting in your car trying to start your car with nothing happening. This article is here to break through your frustration, grab some tools and replace that fuel pump.
Some of these signs are:
- Engine idles erratically.
- Engine surges while holding accelerator steady.
If you notice your vehicle is doing any of these things, it's very likely it could be the fuel pump or another related part. If you are looking to troubleshoot the problem, always start with the easiest, cheapest thing and don't just throw parts at it. There are many tests that can be performed to pinpoint the failing component and keep you from spending lots of money and time trying to solve an issue.

Materials Needed
- Millimeter sockets, sizes 8mm-17mm
- Ratchet
- Millimeter wrenches, sizes 8mm-15mm
- Needle nose pliers
- Flat head screwdriver
- Small Phillips head screwdriver
There are two different types of fuel pumps on the Toyota Camry. Type A uses a bracket to mount the fuel pump onto the pump assembly, and Type B uses a housing to contain the fuel pump. Below are the exploded views of both types. Make sure to identify the one you have and follow the instructions accordingly.
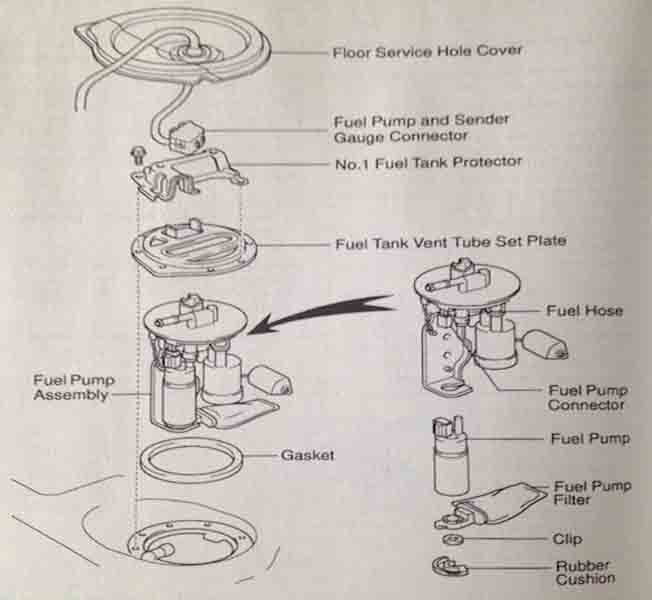
Figure 1. Type A fuel pump. 
Figure 2. Type B fuel pump.
Step 1 – Relieve fuel system pressure
The fuel system in these cars is under constant pressure. Before working on the fuel system, you must relieve this pressure.
Relieve the fuel system pressure as follows:
- Remove fuel tank cap.
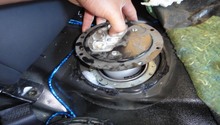
- Remove the rear seat and liner. This will allow you to access the fuel pump/sending unit access cover. You have to do this anyway to access the fuel pump.
- Disconnect the harness connector.
- Start the engine and allow it to run until it stops.
- Disconnect the negative battery terminal. (If your car stereo is equipped with an anti-theft system, make sure you have the correct activation code before disconnecting the battery.)
- Loosen the fuel line fitting at the bottom of the fuel filter. Fuel will leak out when you do this, so be ready with rags and/or a container to catch it.

Step 2 – Disconnect the fuel line from the fuel pump
In relieving the fuel system pressure, you should have already disconnected the battery, removed the rear seat, removed the fuel pump/sending unit floor service hole cover, and disconnected the electrical connector. If you have done all that, then the next thing you will want to do is disconnect the fuel line to the pump. If it is a flared fitting, you will use a wrench and a backing wrench. If it is a quick disconnect fitting, you will pinch the tabs, push and then pull the fitting off of the fuel line. Make sure to replace the retainer on the fuel line once it has been disconnected. To gain access to the quick disconnect line it will be necessary to remove the fuel tank fitting protector mounting screws to gain access.

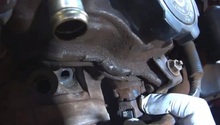
Figure 4. Fuel pump flare fitting. 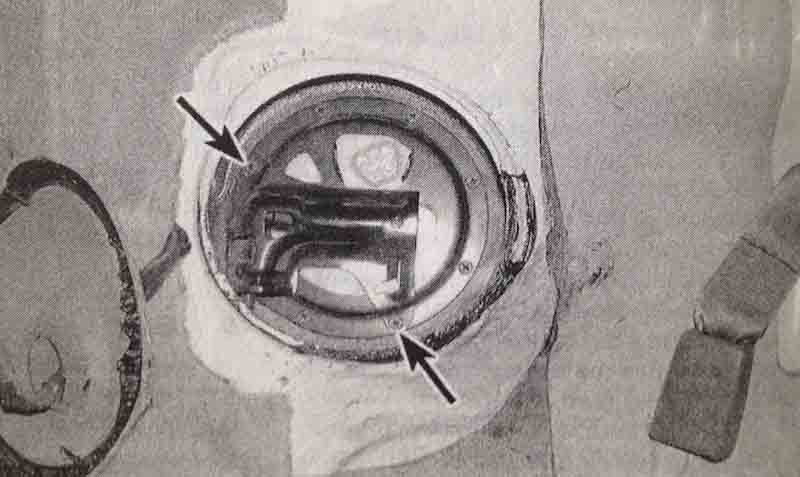
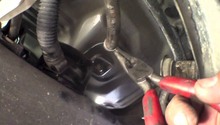
Figure 5. Fuel tank protector mounting screws.
Step 3 – Remove the fuel pump retaining bolts
The last thing holding the fuel pump and sending unit in place are the retaining bolts. Remove these bolts; that will allow you to remove the assembly.
Step 4 – Remove the fuel pump from the assembly
Now that you have the assembly removed from the fuel tank, you can remove the fuel pump from the assembly. This is where it will differ depending on whether you have a Type A or Type B.
Type A
- Disconnect the fuel pump connector at the pump.
- Slide the hose clamp up the hose, pull the lower end of the fuel pump loose from the bracket, and withdraw the pump from the hose.

Figure 6. Disconnect electrical connector. 
Figure 7. Slide hose up. 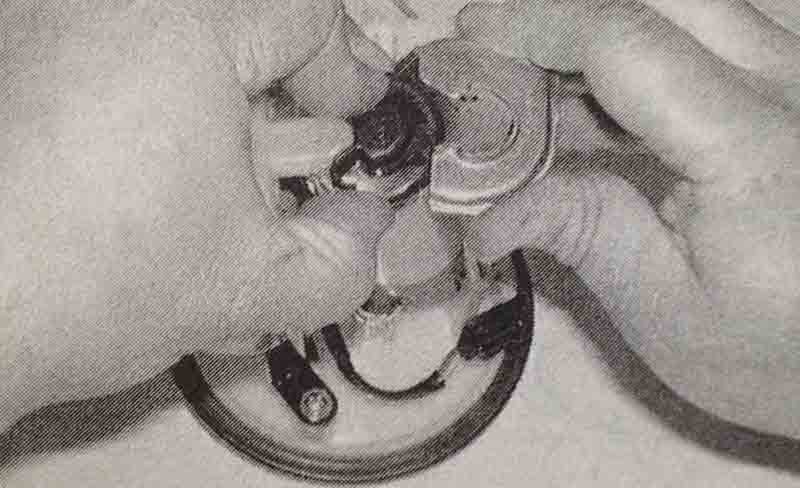
Figure 8. Detach pump from bracket.
Type B
- Remove the fuel sending unit.
- Remove the fuel filter by removing the mounting screw.
- Remove the pump flange by prying up on the housing snap-retainers in the sequence shown.
- Disconnect the fuel pump electrical connector.
- Remove the upper bracket by prying on the snap-retainers in the sequence shown and separating the fuel pump from the housing.

Figure 9. Remove fuel filter mounting screw. 
Figure 10. Sequence for snap retainers on fuel pump flange. 
Figure 11. Sequence for snap retainers for bracket on upper section of fuel pump assembly.
Step 5 – Reassemble fuel pump/sending unit assembly
At this point, the assembly should be completely disassembled and ready for you to install the new fuel pump onto the assembly and get it ready for installation. Assembling the fuel pump assembly will be the reverse of removal and will depend on which type you have. You will also need to swap over the strainer from the old pump. If the strainer looks like it has a lot of debris caught in it, make sure to replace it with a new one.
Step 6 – Install assembly back into fuel tank
After you have the assembly reassembled, you can then install the assembly back into the fuel tank. Again the installation of the assembly will be the reverse of removal.
- Carefully place the assembly back into place.
- Install the mounting screws.
- Connect the fuel line fitting.
- Connect the electrical connector.
- Install floor service hole cover.
- Install the rear seat.
- Install the fuel tank cap.
- Reconnect the bottom fitting on the fuel filter.
- Reconnect the negative battery terminal.
- Start engine. It might take a few turns to fire up due to the fact that the fuel system pressure was relieved.
Related Video
- Camry 1997-2001 Fuel Pump Replacement - Youtube.com